
One of our all time favorite projects! This was our home on wheels for several months between moving from one home to another. Of course we could have bought new but quickly learned newer trailers are so expensive and just not made well. We searched and searched. Realizing we could not find anything worth spending our money on.
This was our second trailer remodel. A little hesitant to taking on another renovation we finally decided who are we kidding?! This is what we do. Thankfully trailers are smaller than an actual houses so the remodel really didn’t take long. I also love how you get to play around with cheaper fun materials because of the trailer weight. It’s not recommended to add heavy tile to a travel trailer or countertops so it pushed me to be even more creative. Adding style, staying under budget and choosing light weight materials was a challenge I accepted.
In another blog post I’ll go more into detail with sharing how I did certain DIY projects. Today please enjoy all the before and afters! I will also share all the links so you can shop each space!
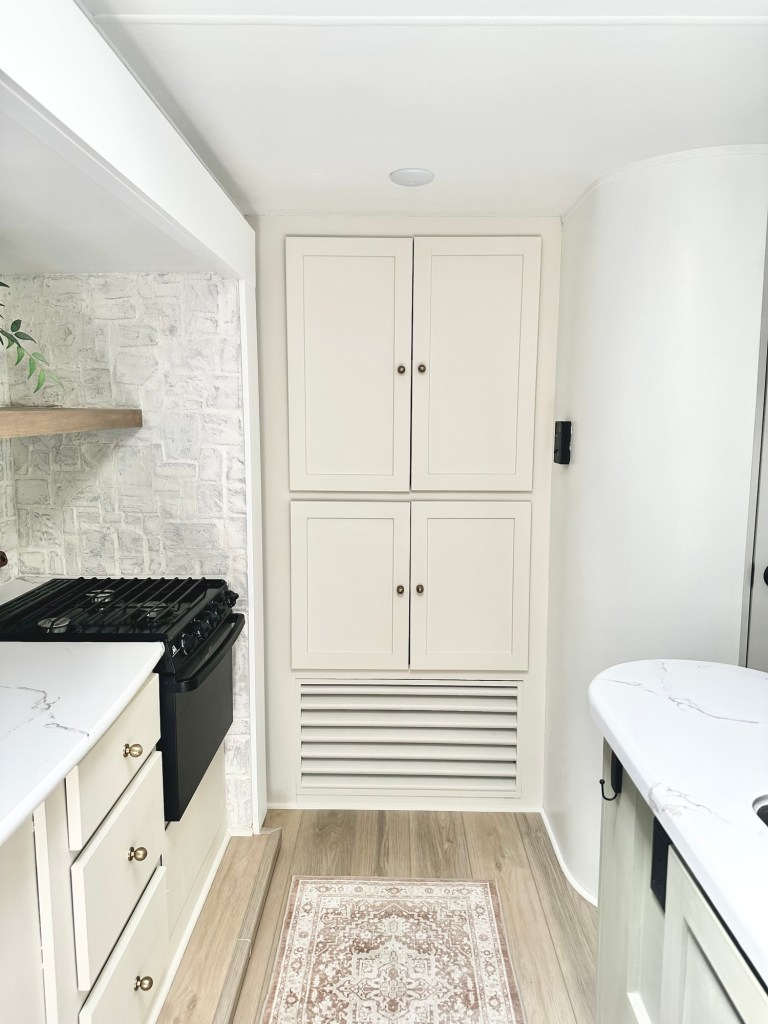
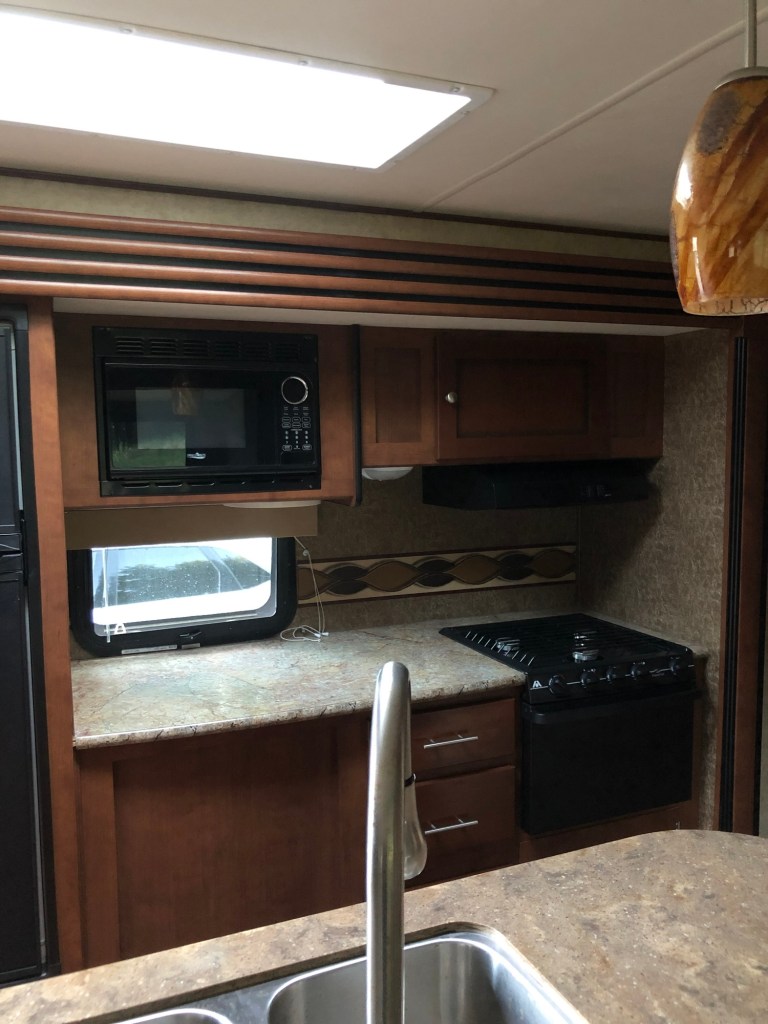
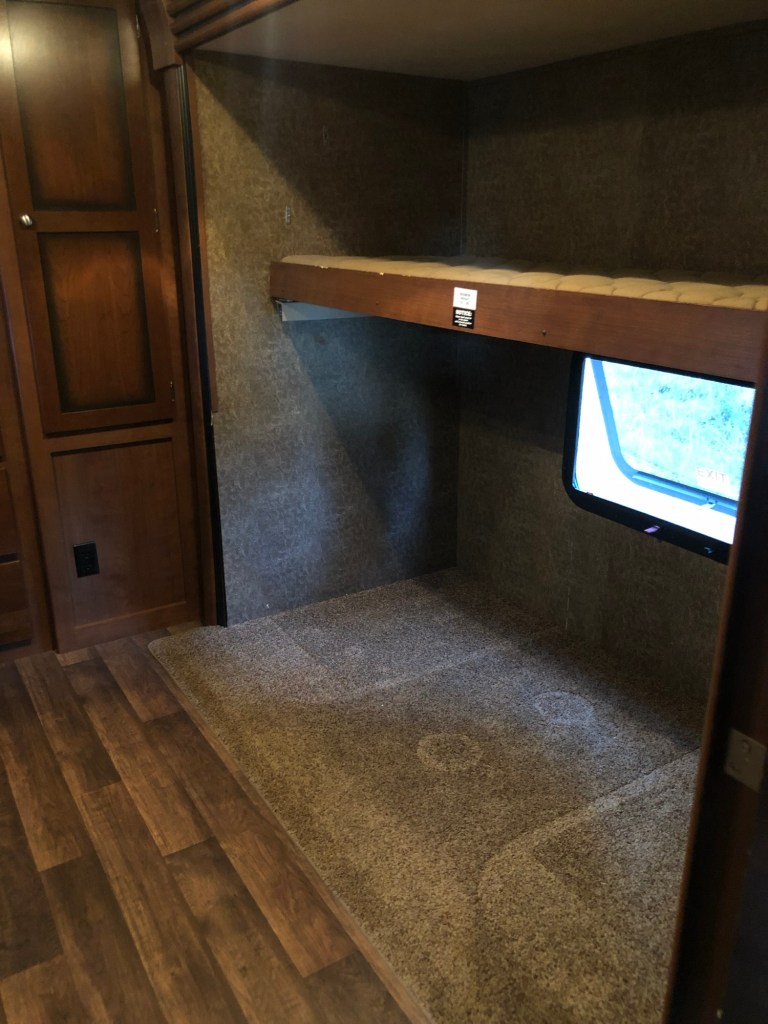
First here are the specs of the trailer! The layout was perfect for our family and I loved the island and pantry. The bunk room was a want/need as well as the main bedroom having an actual door on it!

If you’re looking for a clean well kept trailer in Oregon make sure to checkout Good Vibes RV Sales on Facebook. They specialize in selling desirable trailer layouts that are in pristine condition for a lower cost. That’s where we found ours. The trailer itself was built so solid and sound. The perfect layout too.

DETAILS
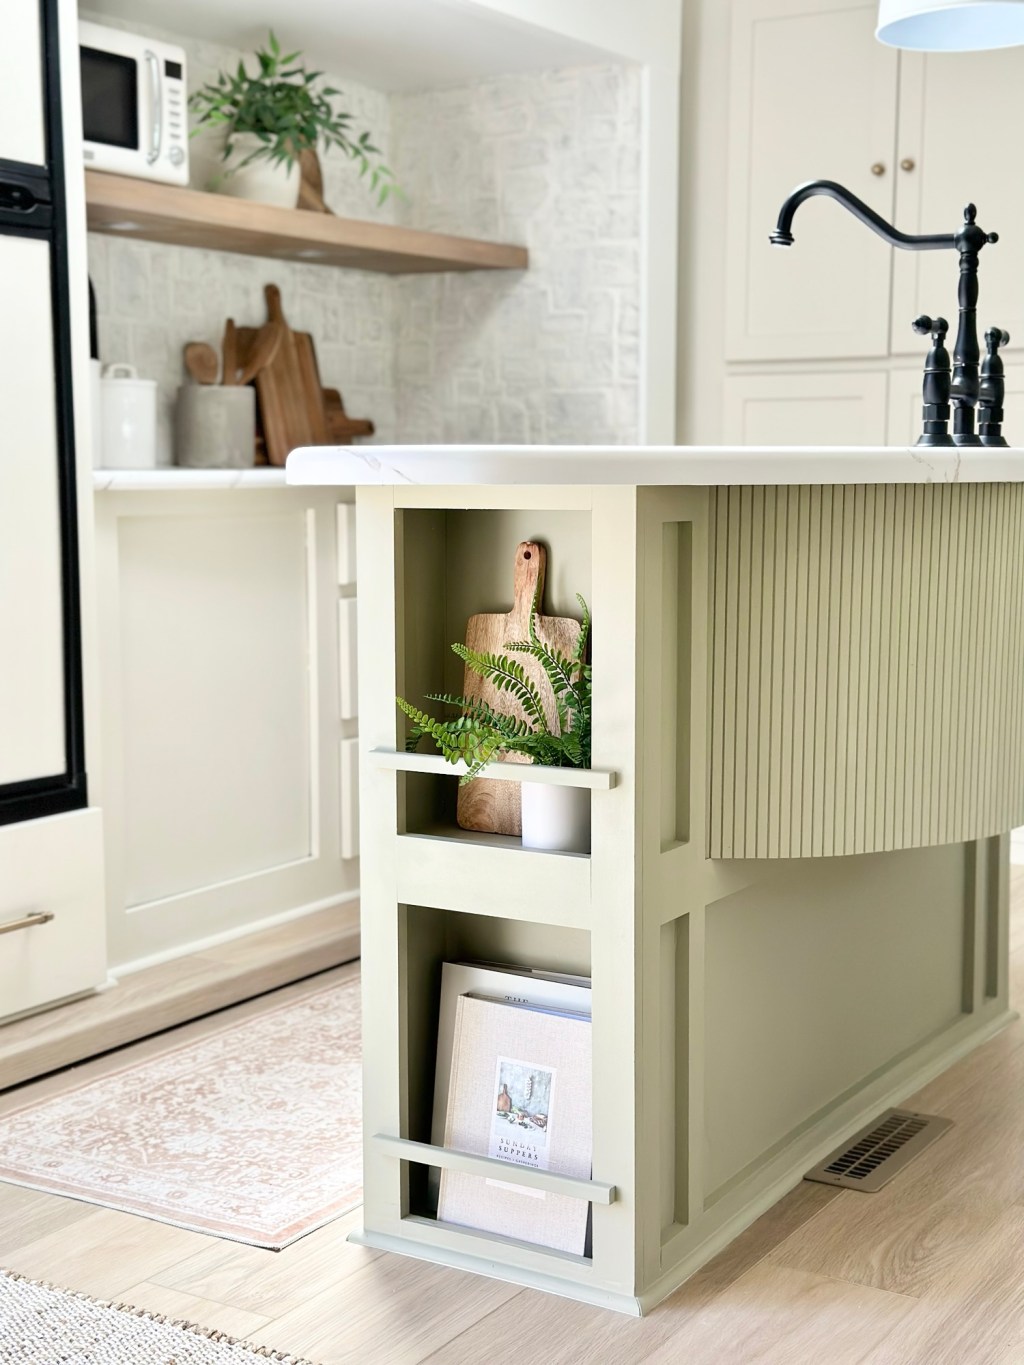
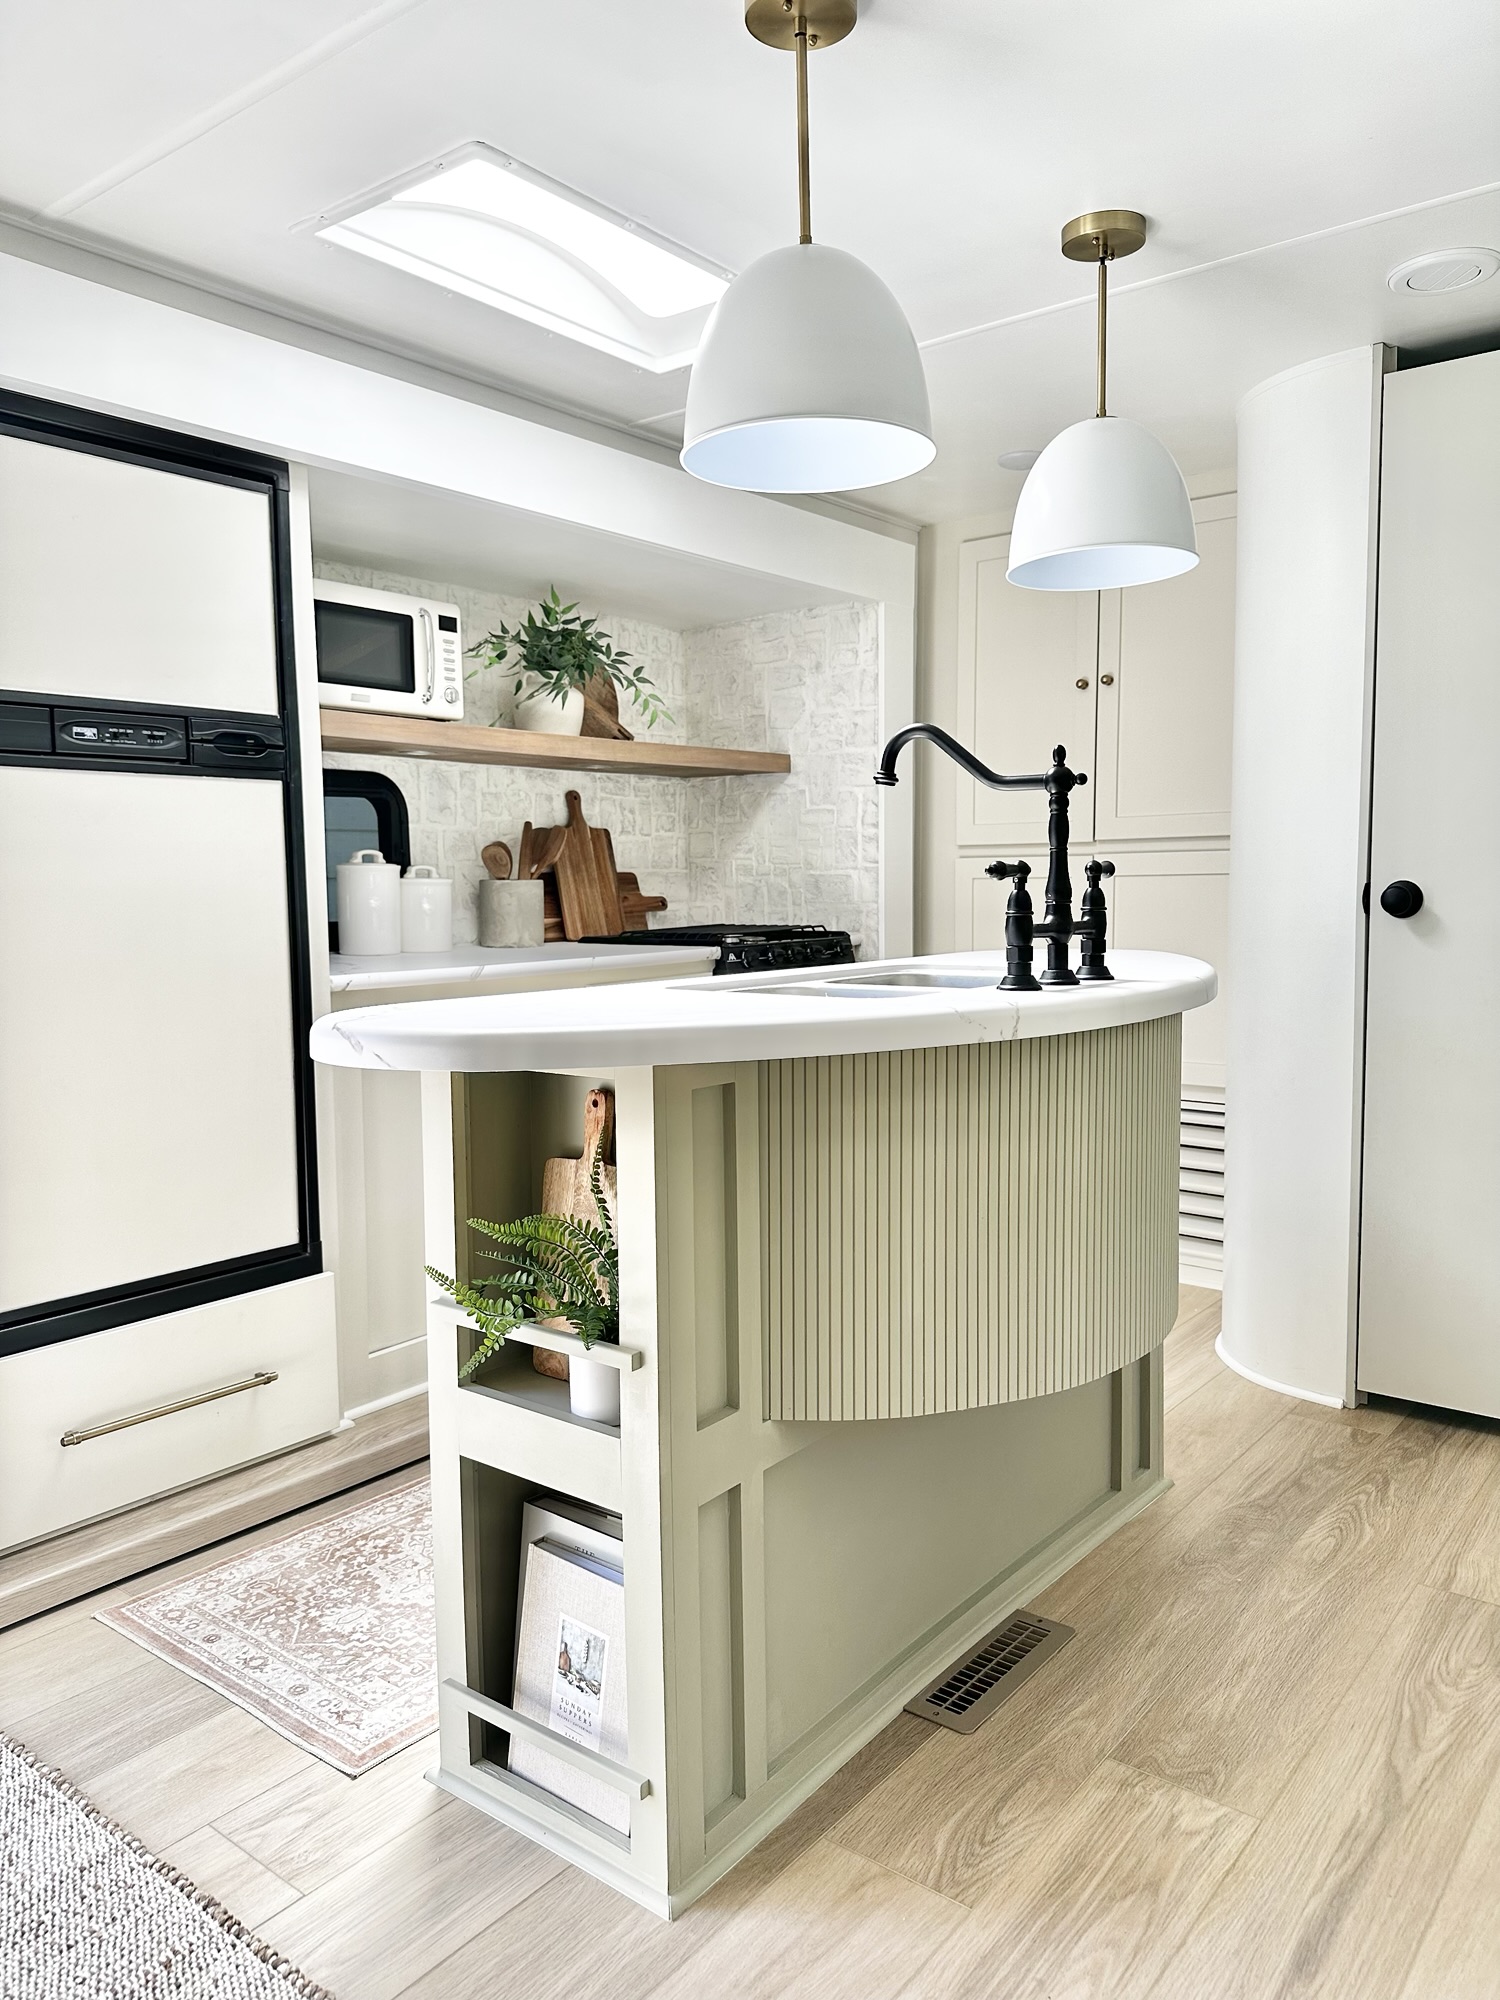
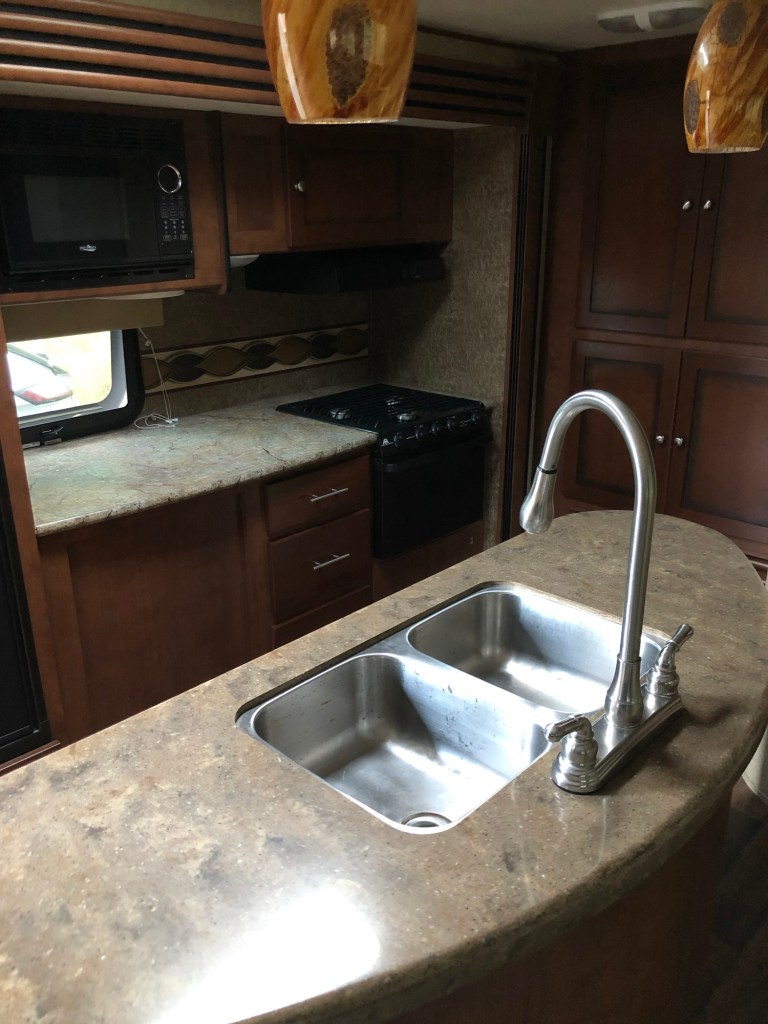
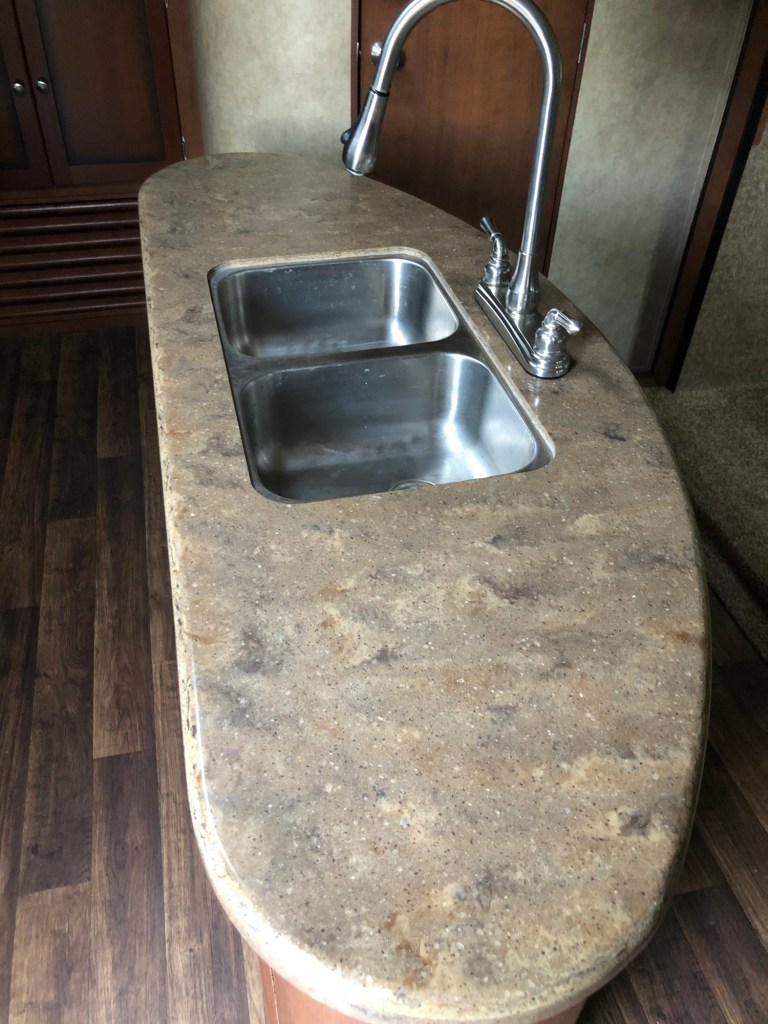
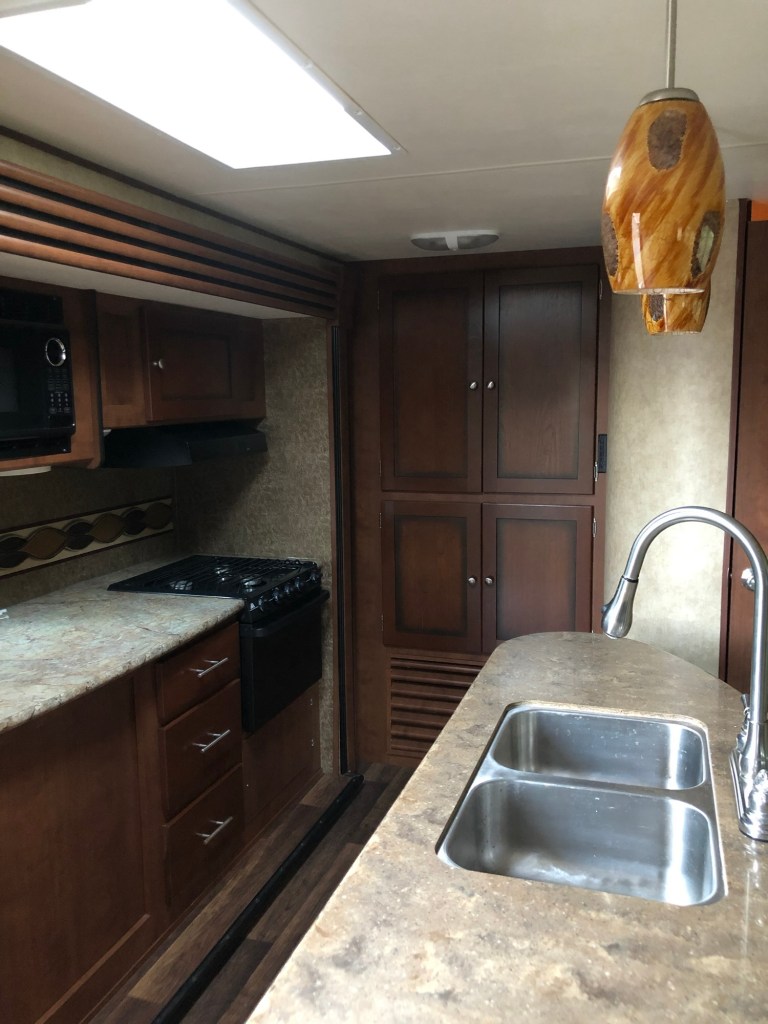
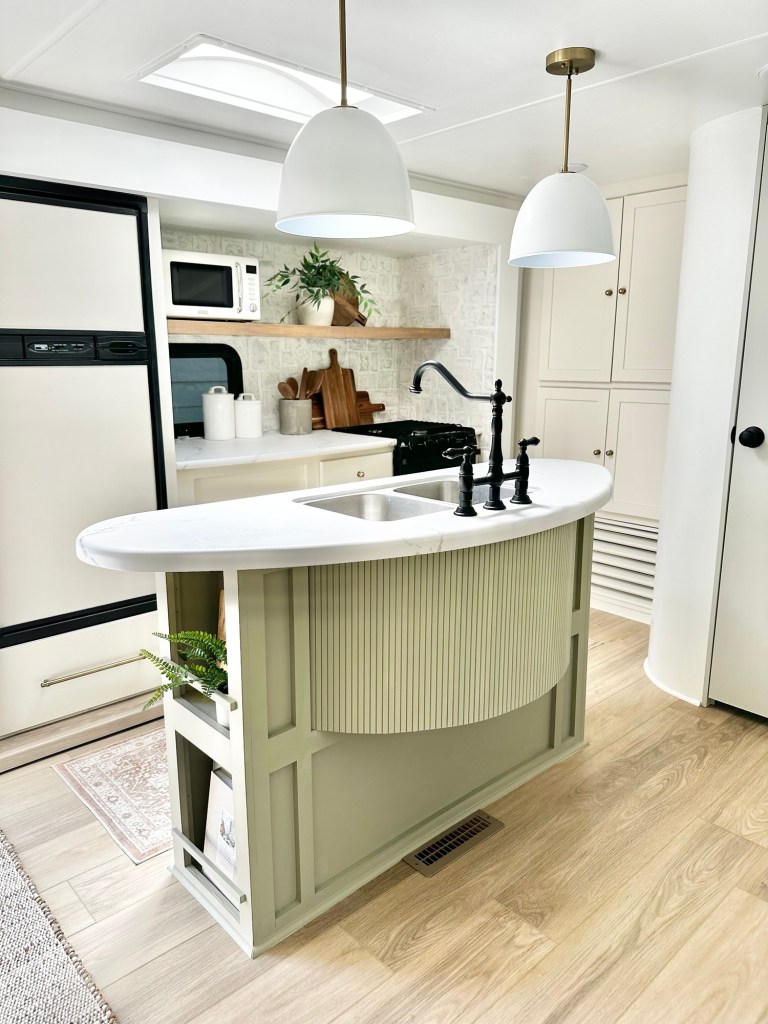
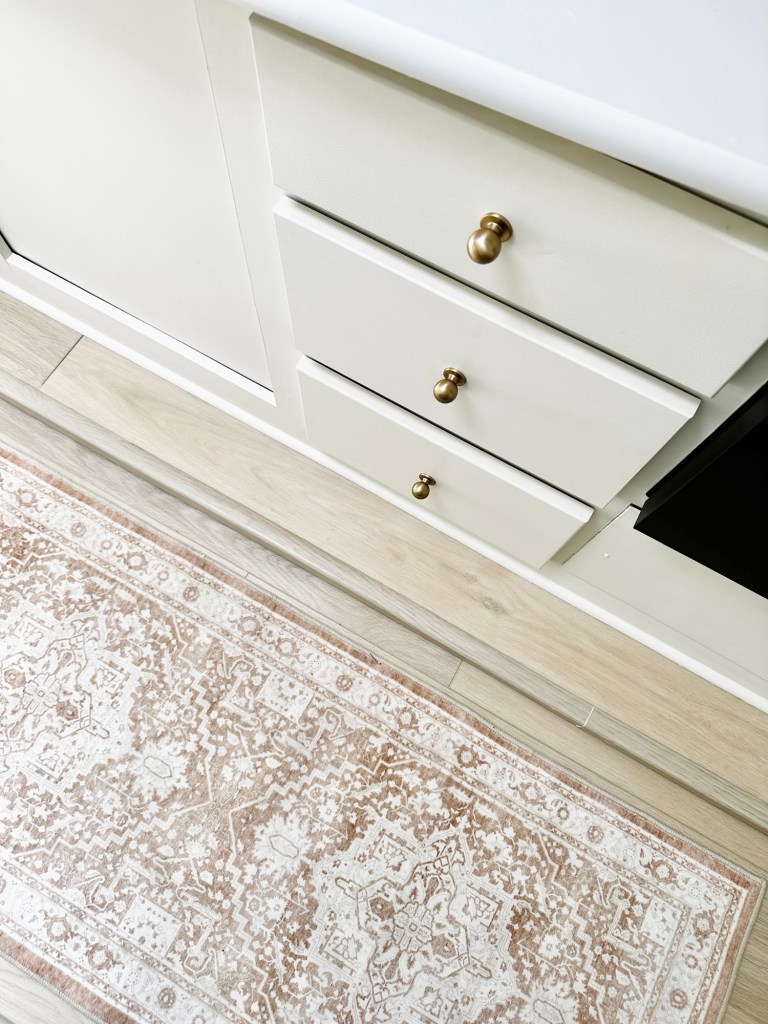
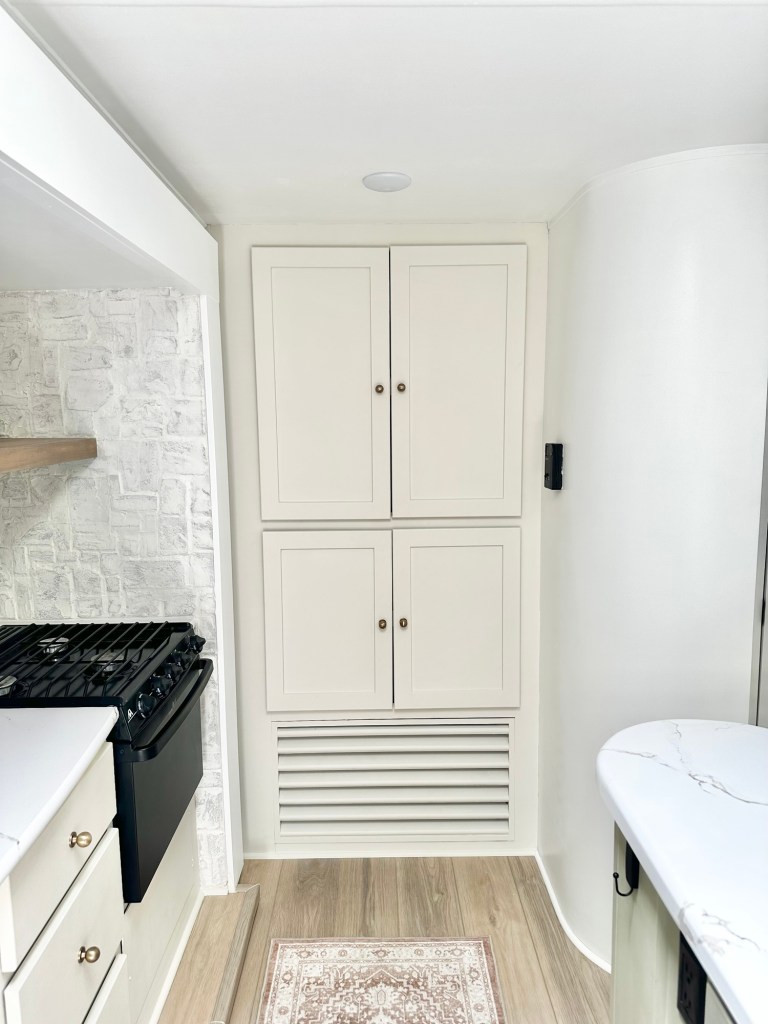
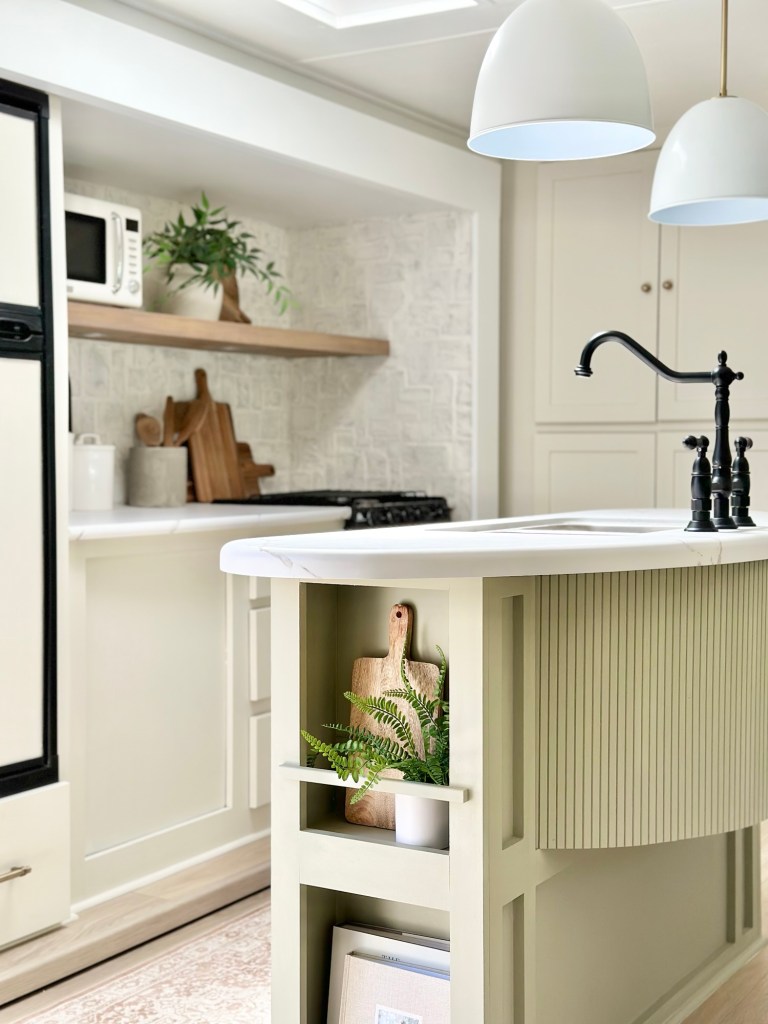
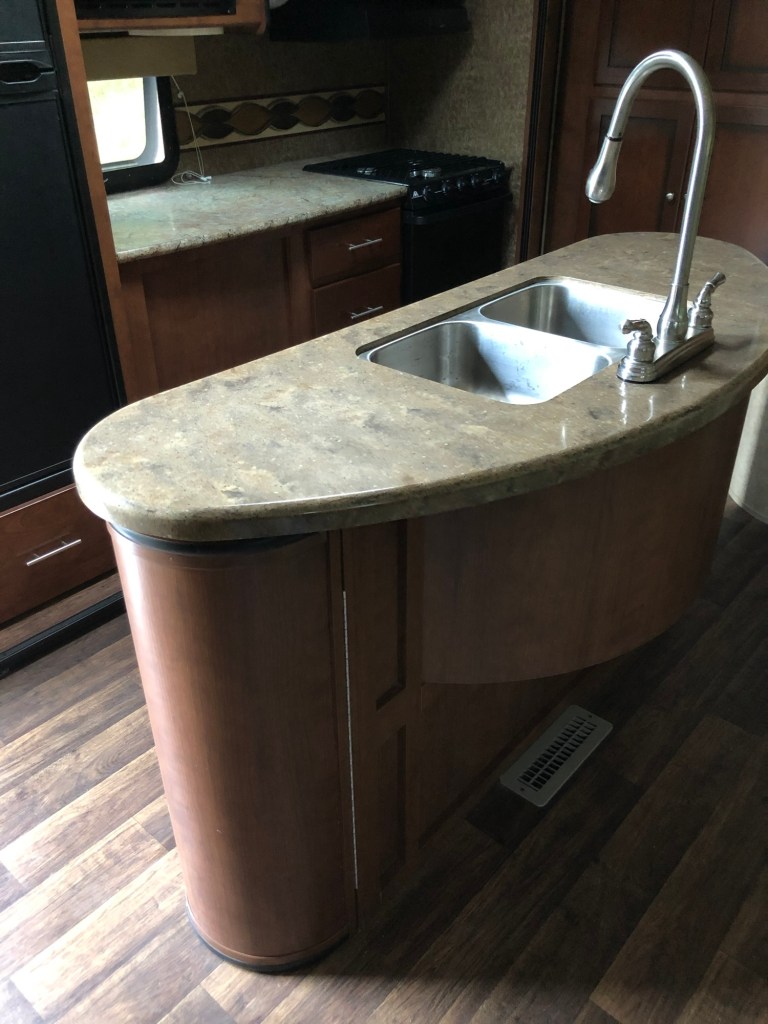
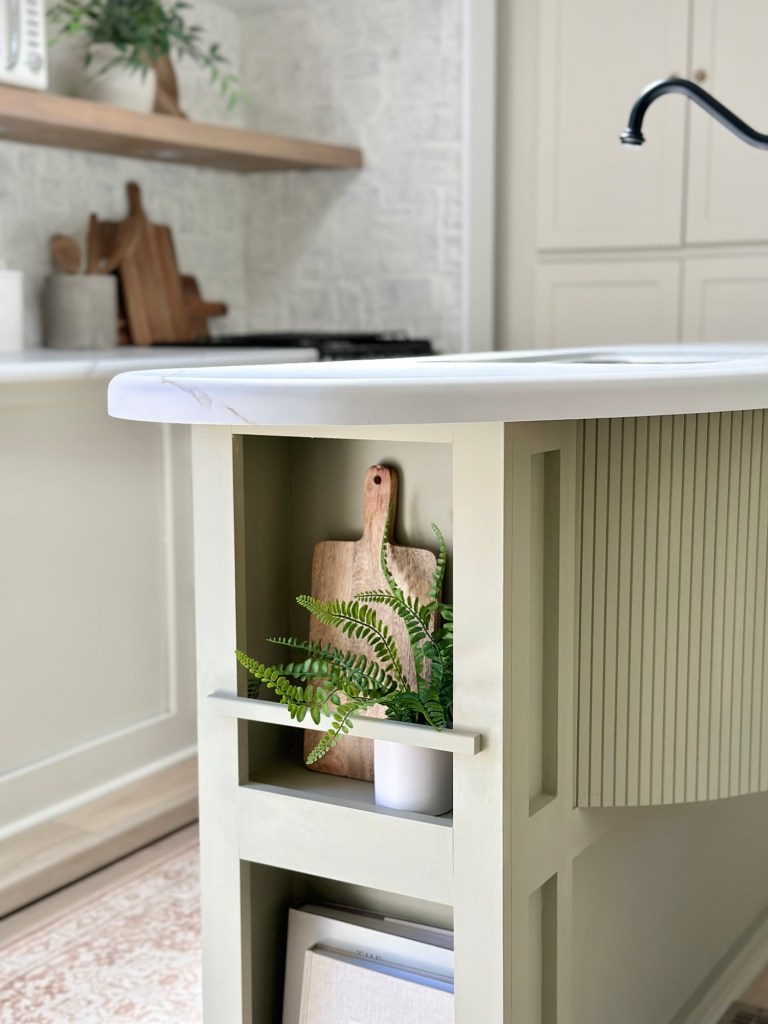
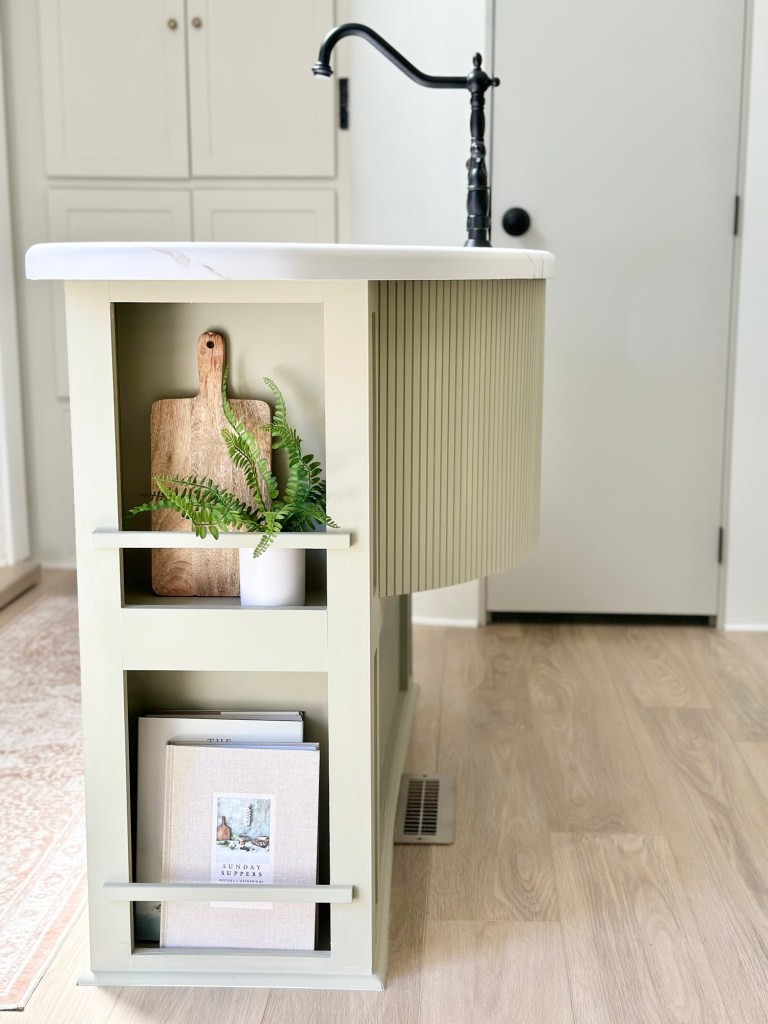
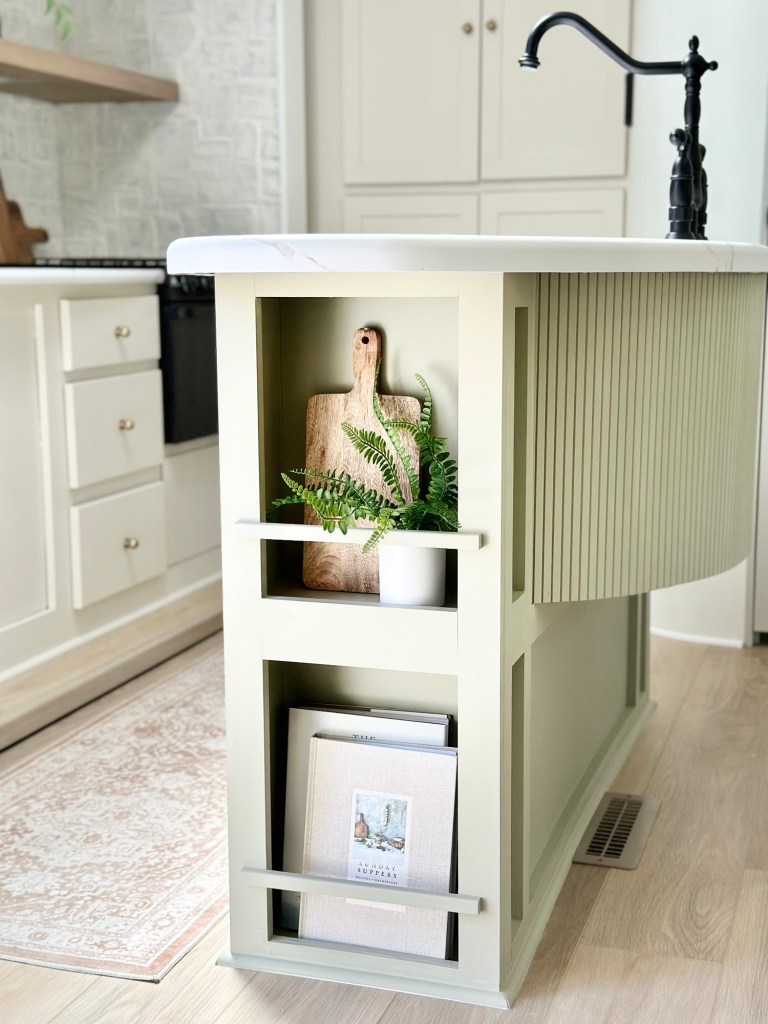
Major affordable updates included adding peel and stick countertop paper to update the old countertops, new faucet and pole wrap on the back of the island. Pole wrap is an easy way to add texture to any space! We removed the secret liquor cabinet on the side of the island while also removing the other side (it had nothing in it) to make it look symmetrical. This opened up the side you could see allowing more open shelving and storage. I updated the pantry with concealed hinges and new hardware.
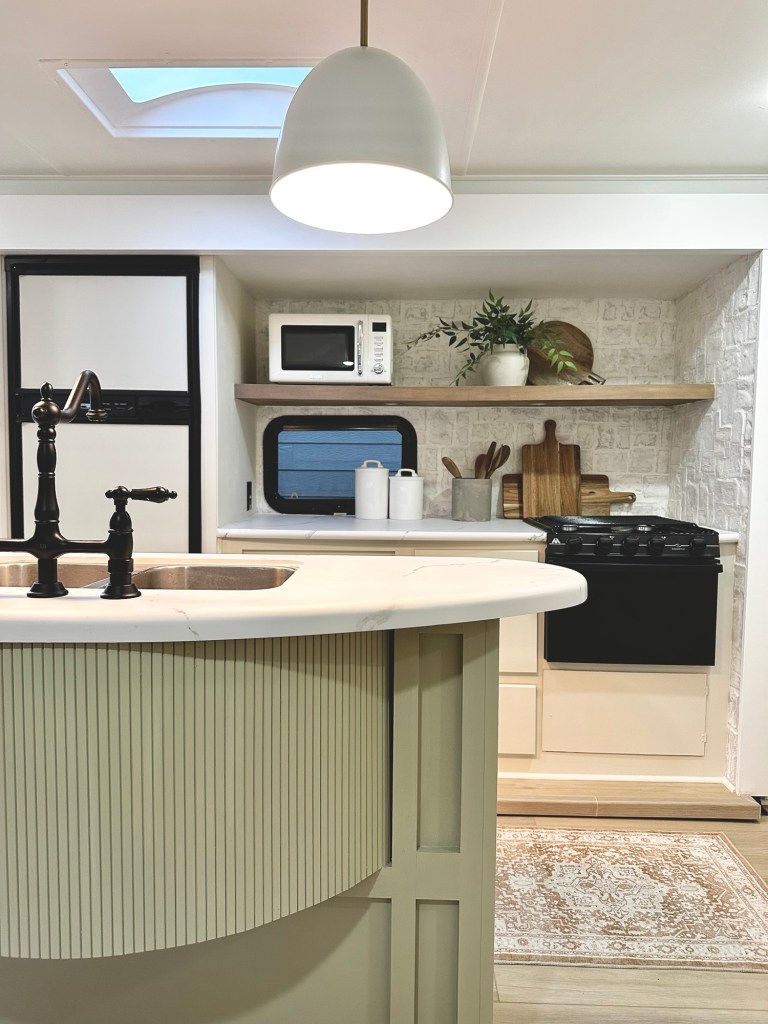
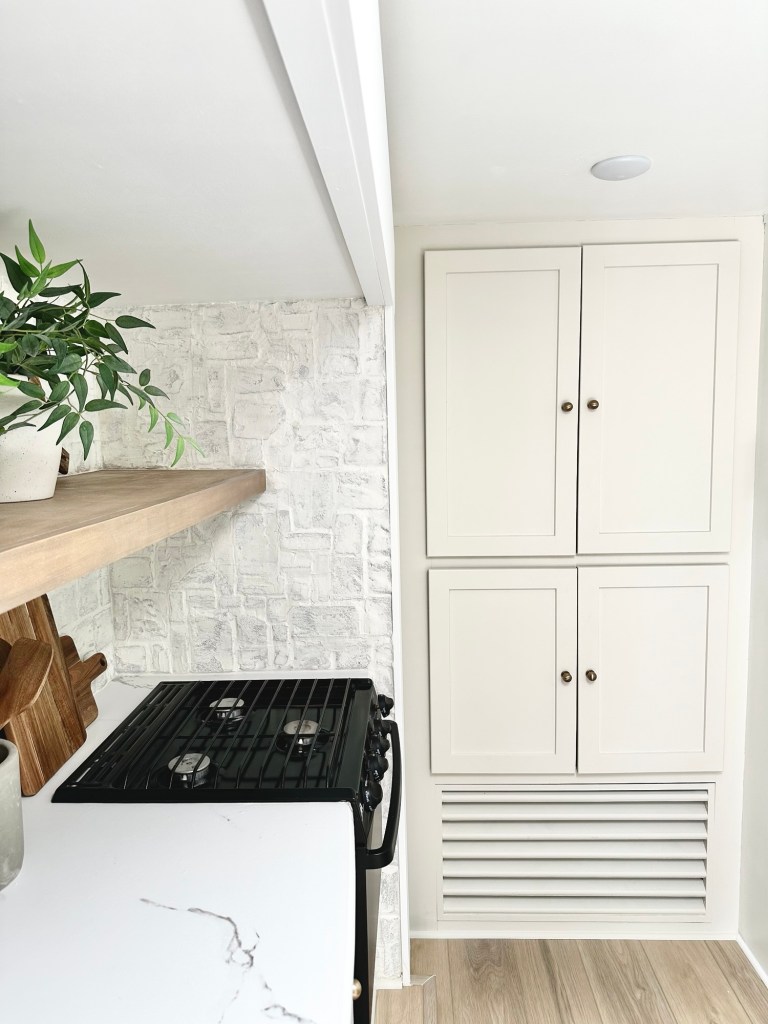
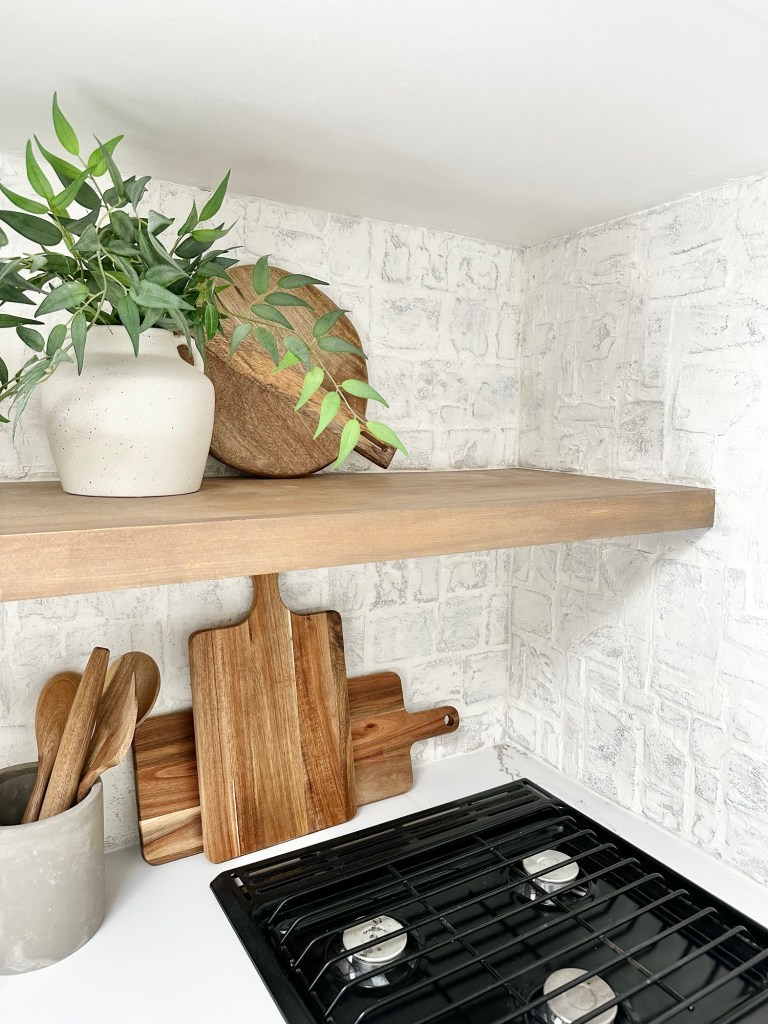
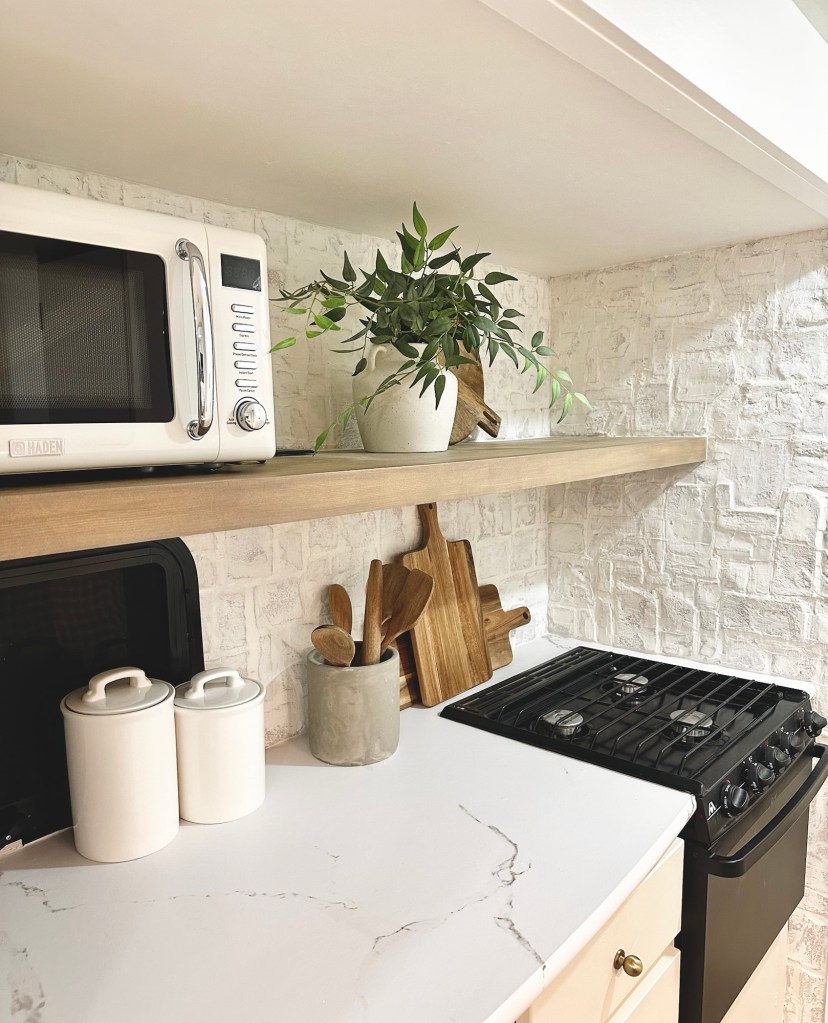
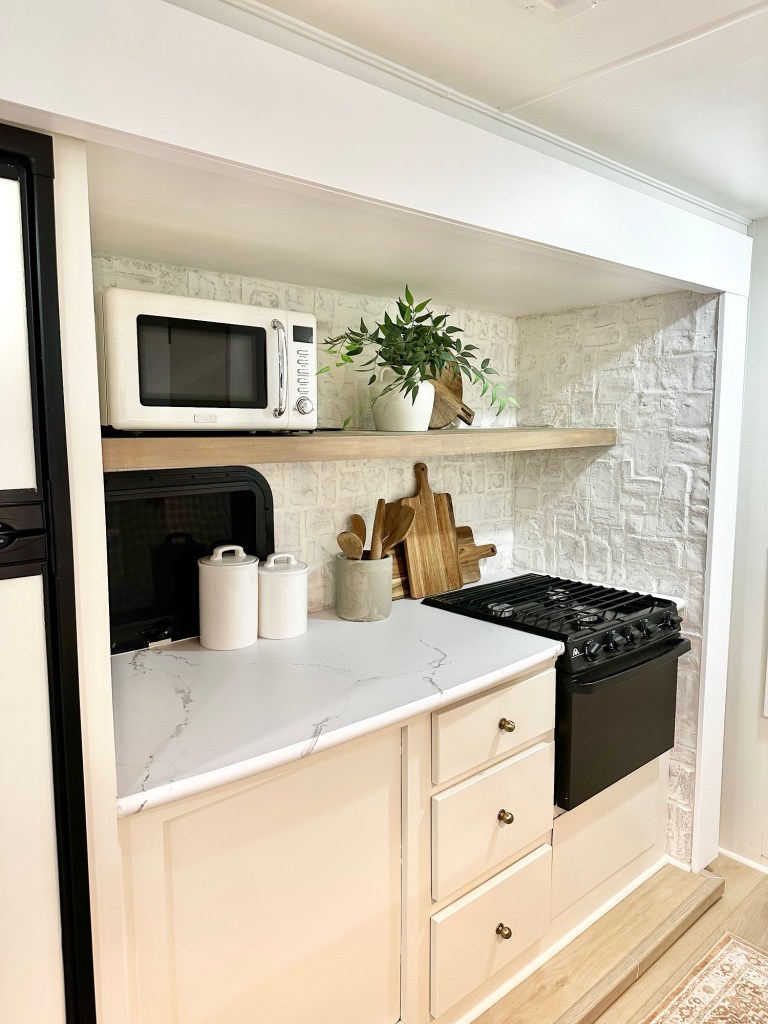
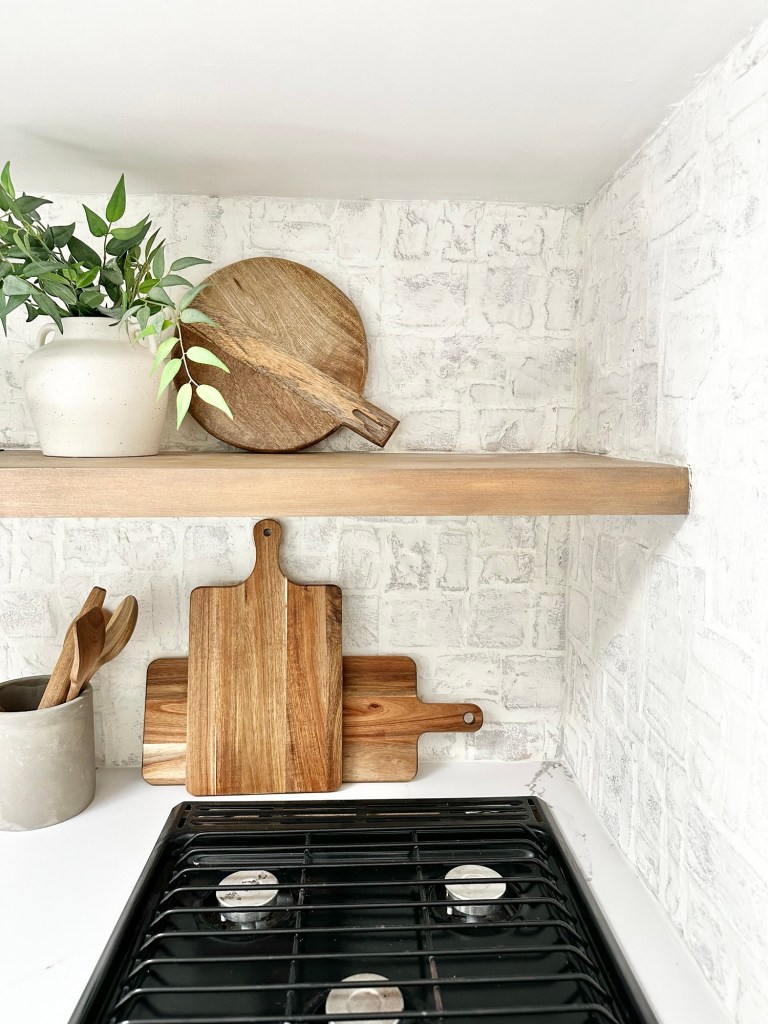
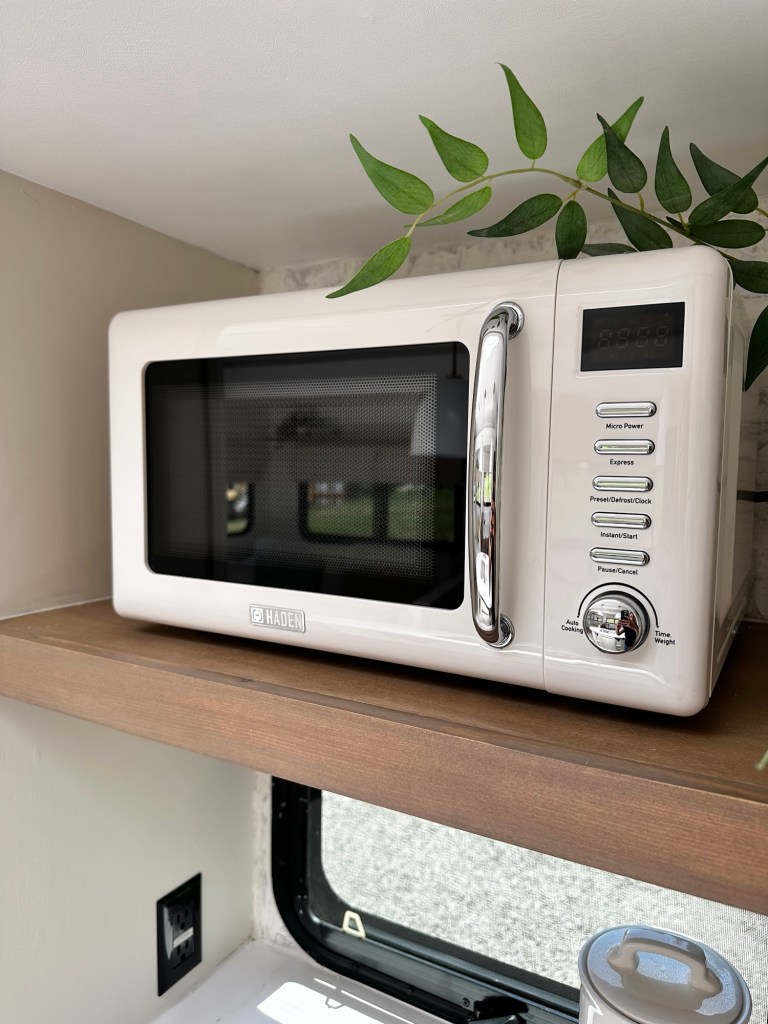
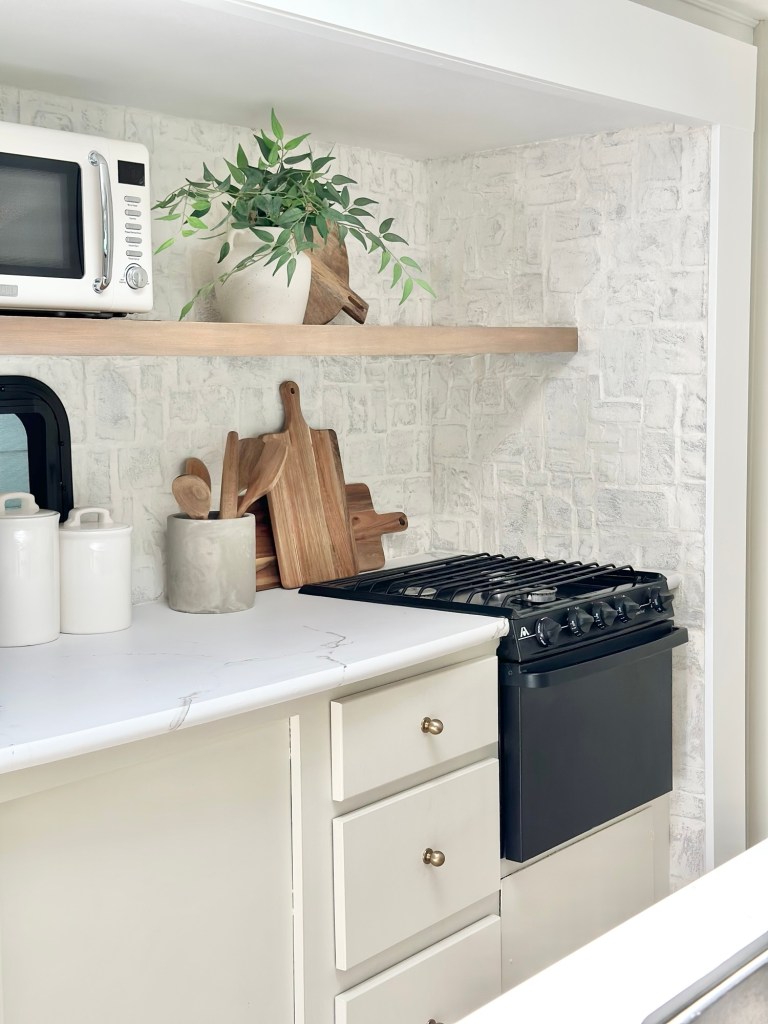
The range side got a huge makeover with new faux stone backsplash and one long open shelf. We added built in lights underneath the shelf using the electrical that was there when we took out the old microwave and vent. I also painted the fridge and it worked beautifully with my favorite magnolia chalk paint and sealing wax.
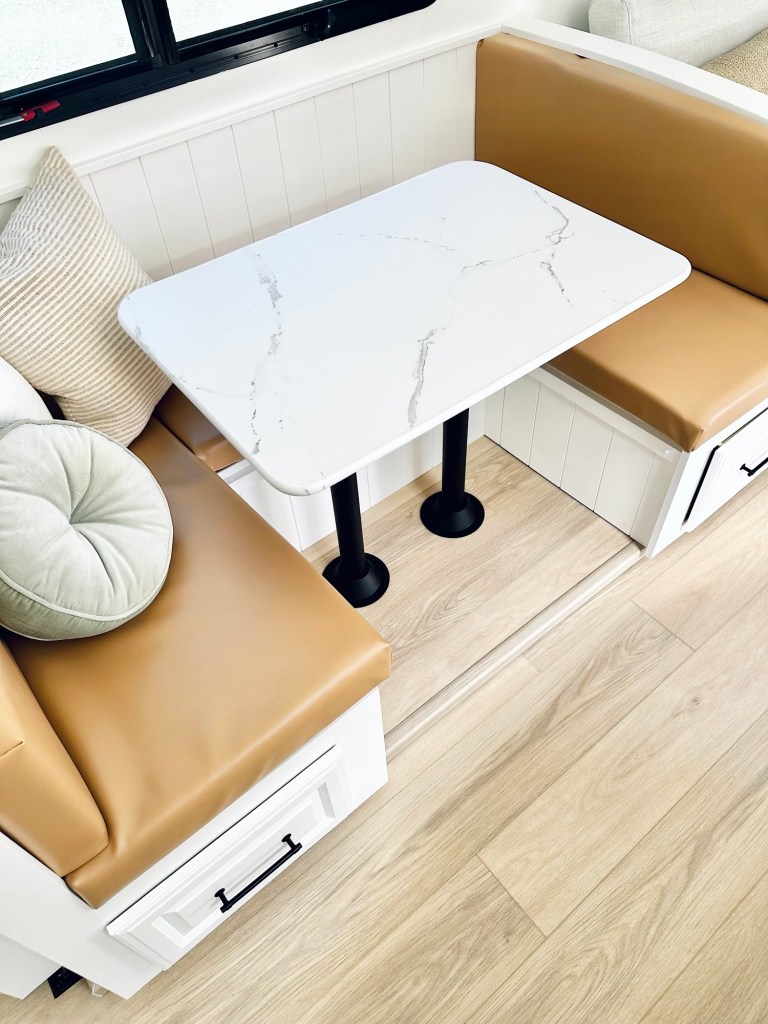
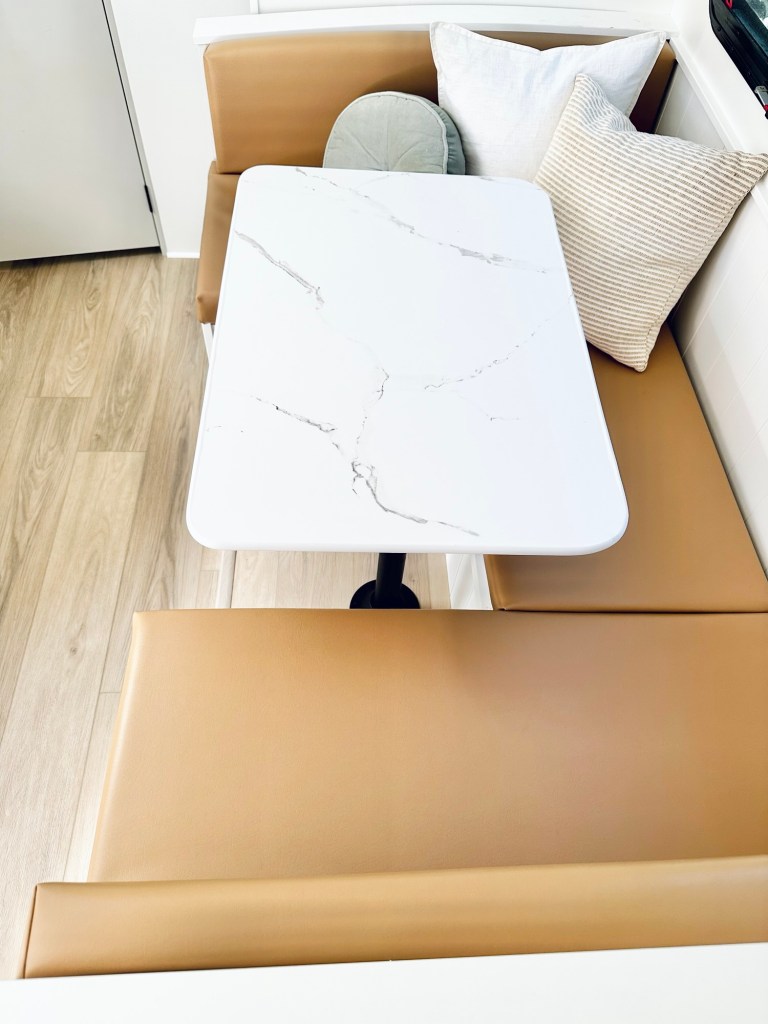
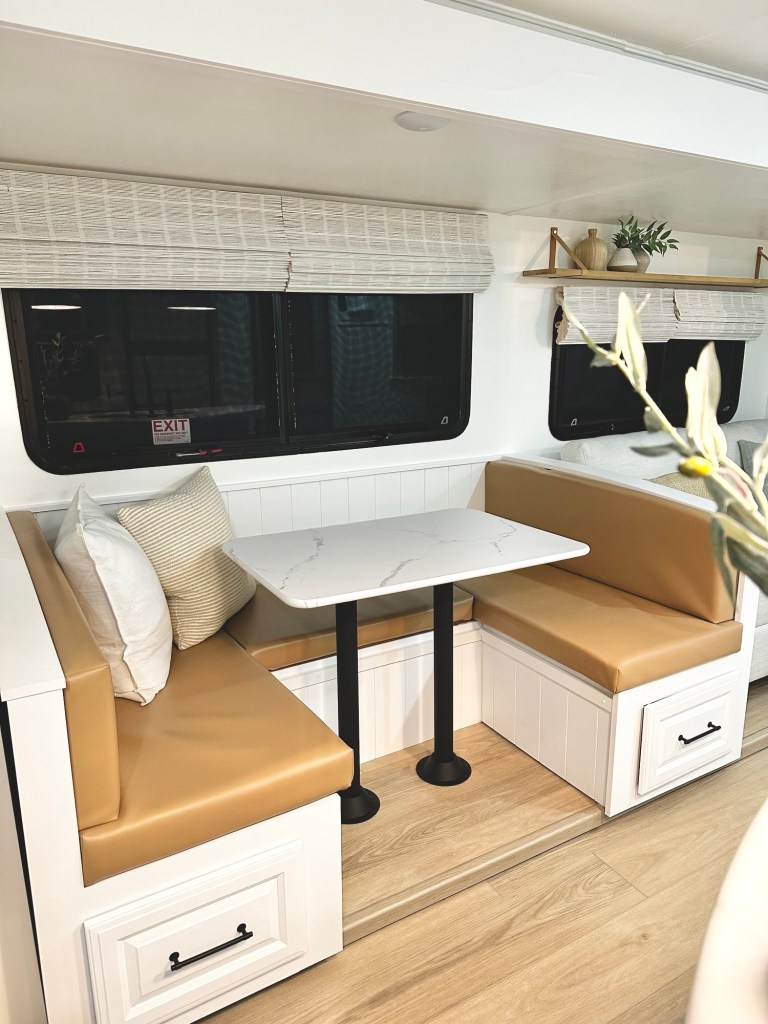
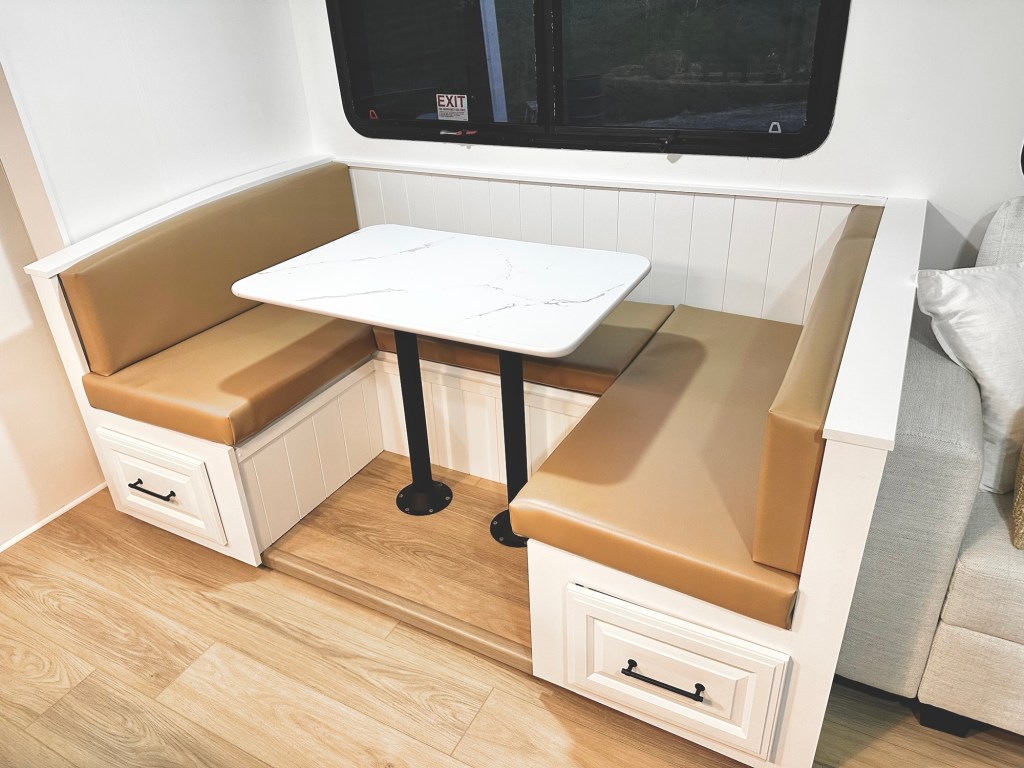
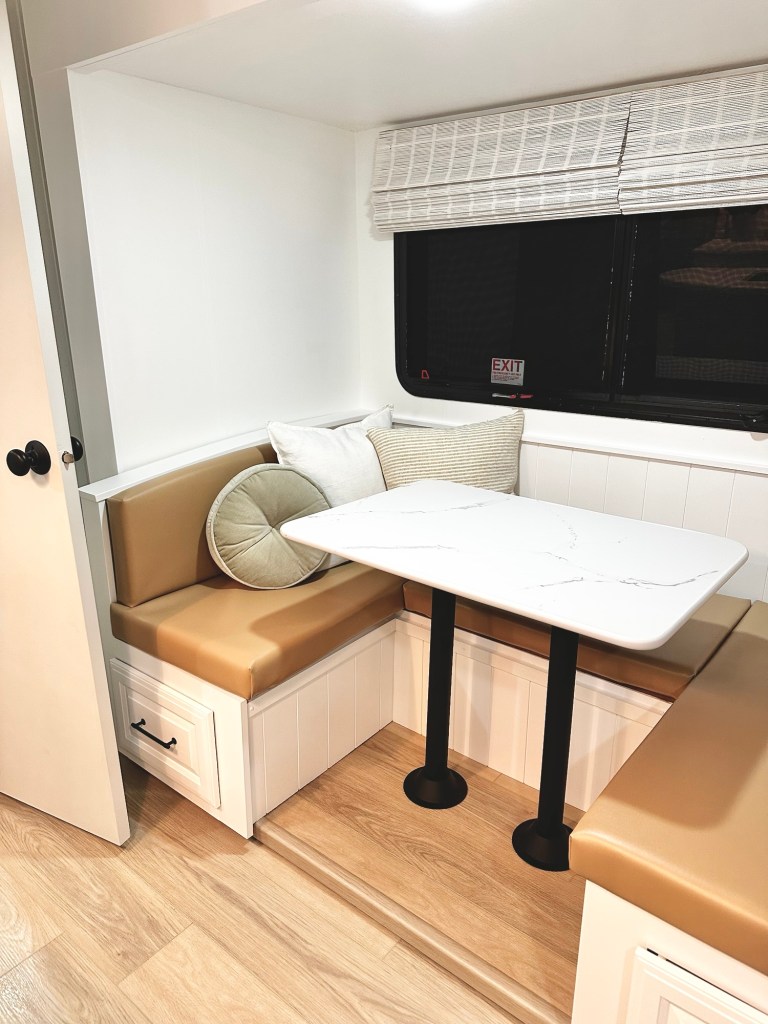
Originally we got rid of the old dinette that was in the trailer. It only had two benches and wasn’t very big. We ripped it out with no plan. At the very end of the project I found a dinette for sale on Facebook that was much larger and a U shape. I added some shiplap to it, my mom made new cushions for it and I covered the table with the same paper we used on the kitchen countertops. It folds down into a bed so it was an overall win in the end.


details
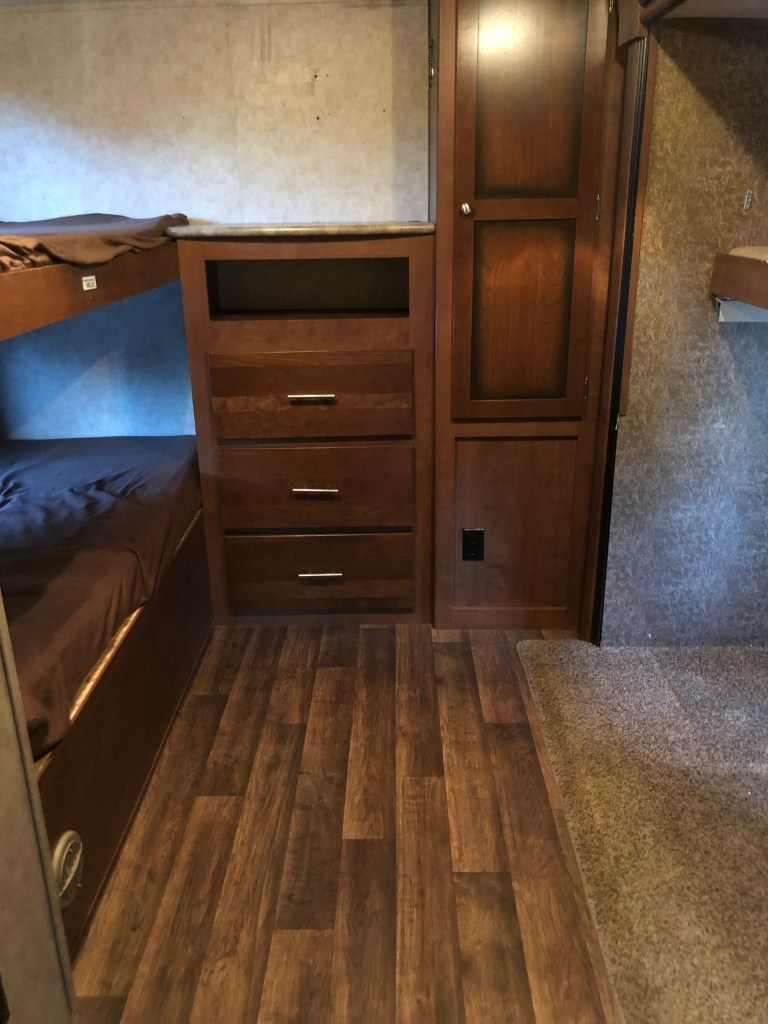
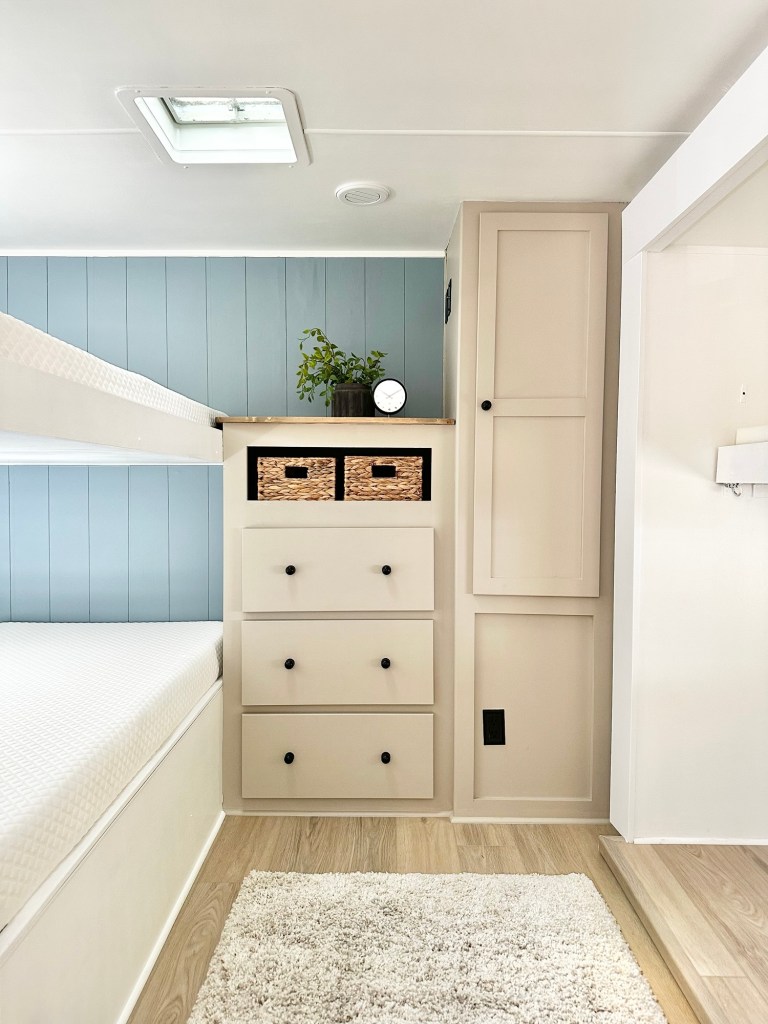
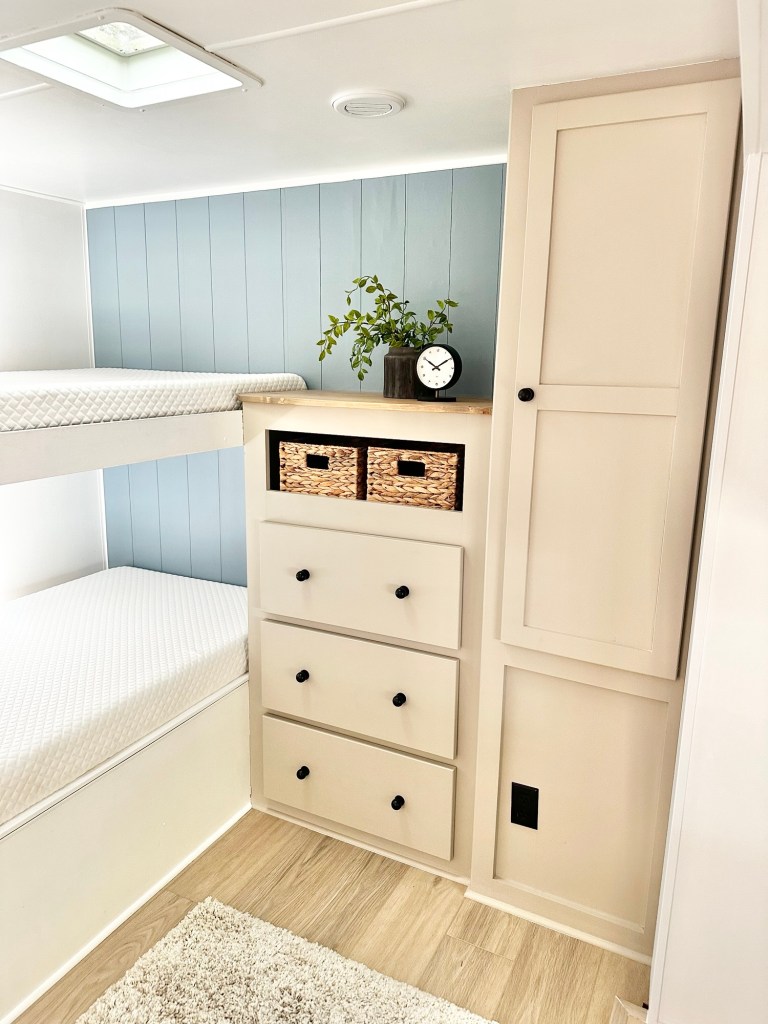
The bunk room we added a new wood top to the media cabinet, painted the cabinets and changed the location of the knobs. My favorite part was the peel and stick wallpaper I did sharpie shiplap on. This wall was inspired by Pure Salt Interiors. White walls, new lights for the bunks and all new flooring throughout.


DETAILS
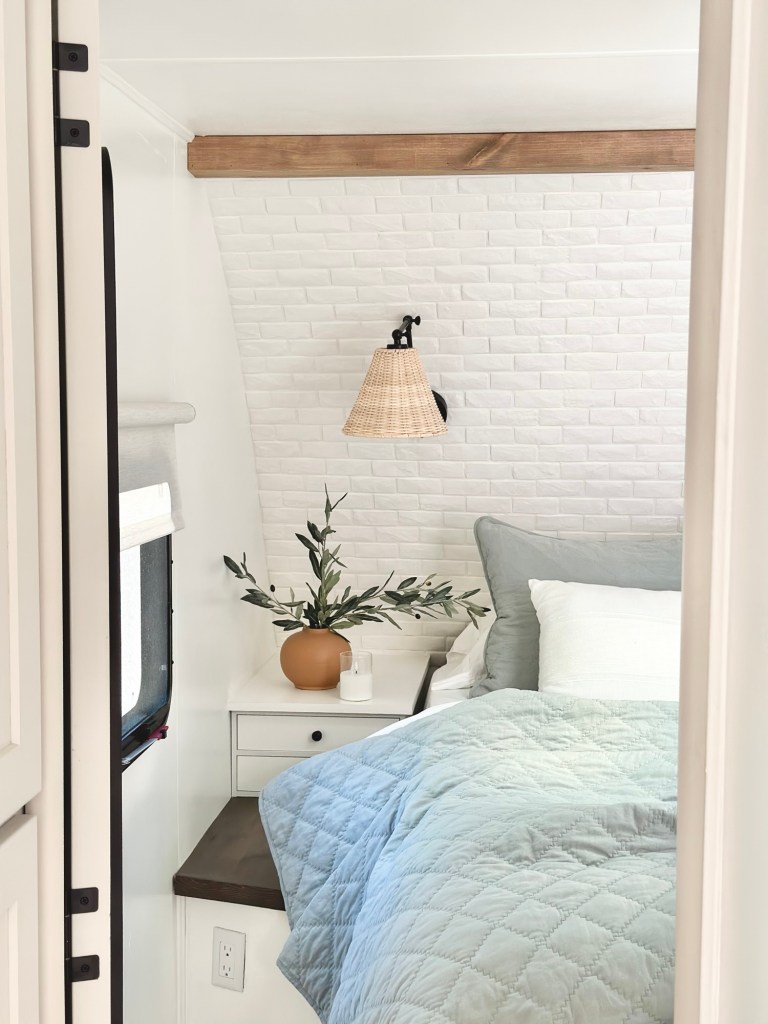
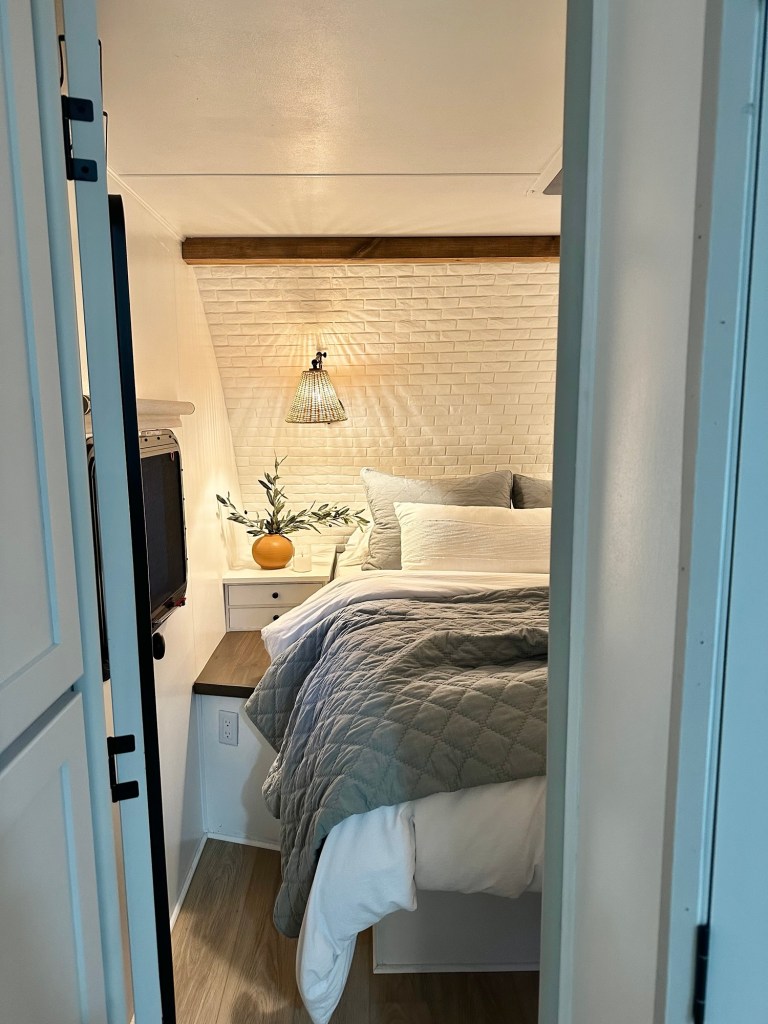
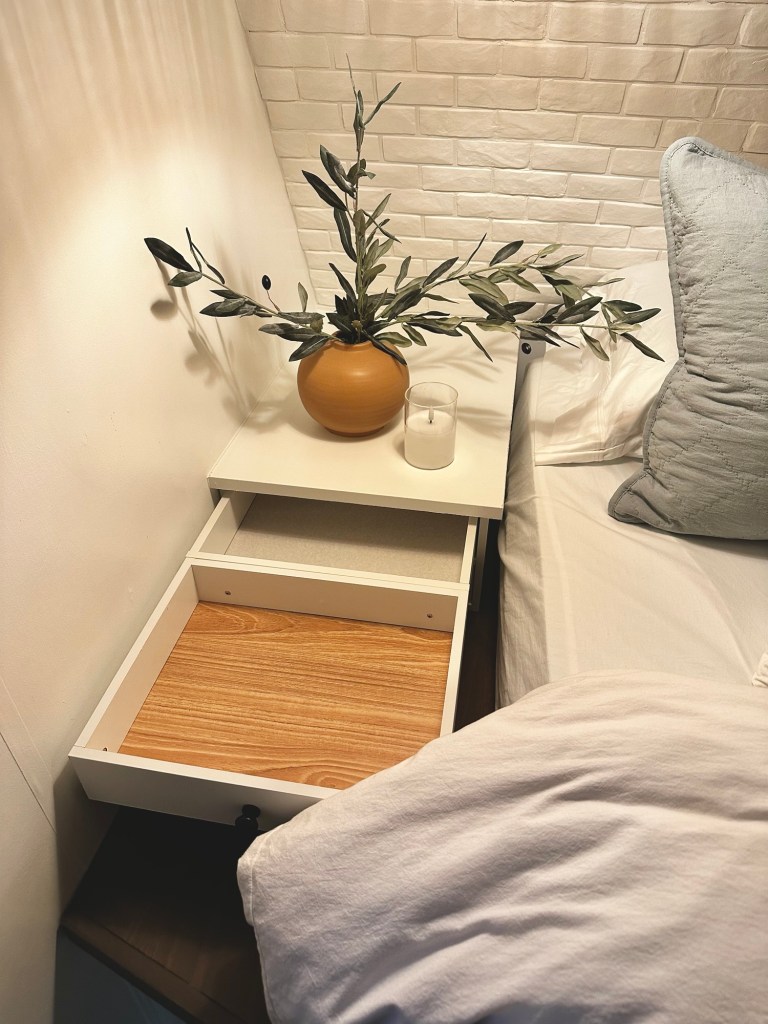
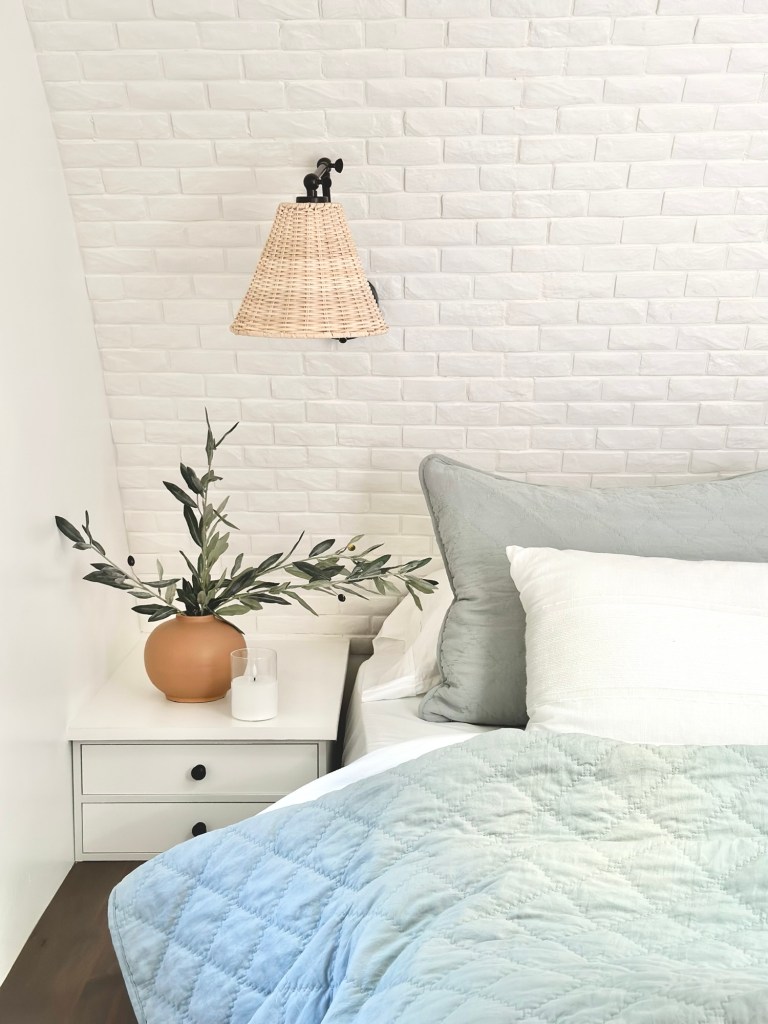
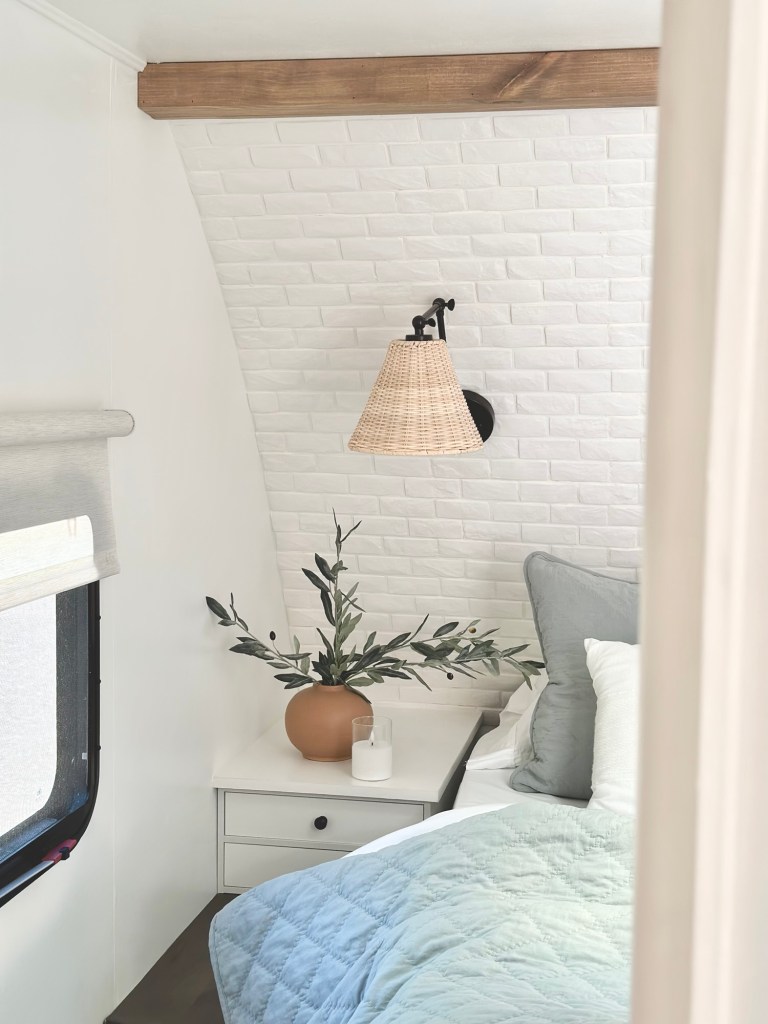
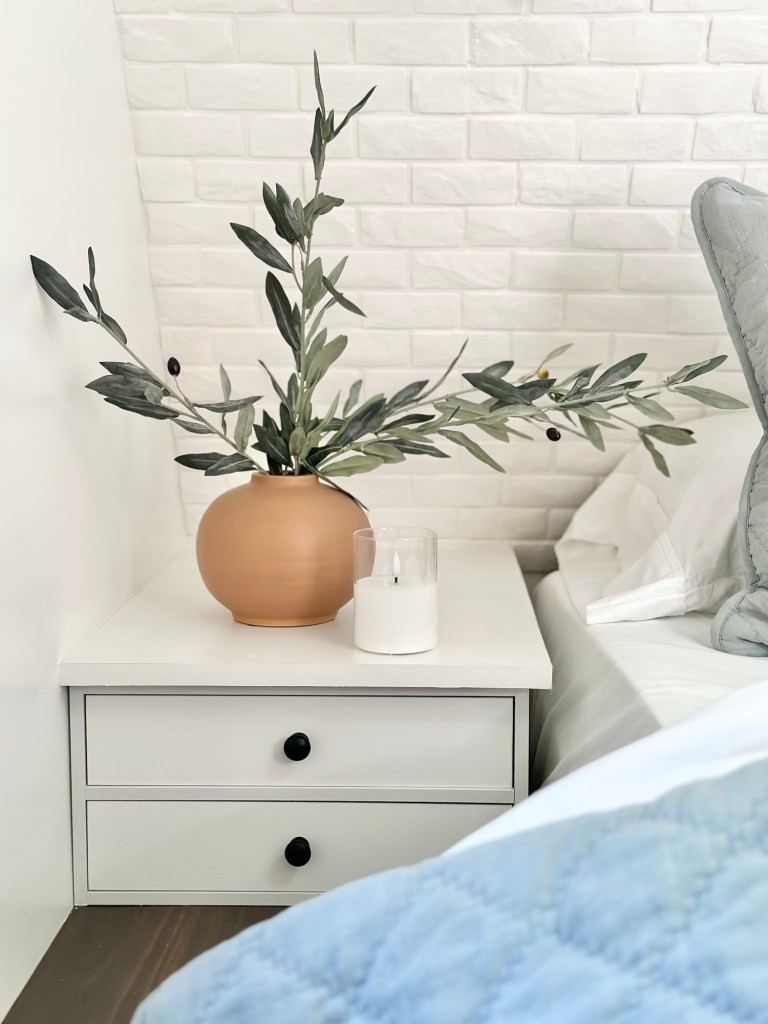
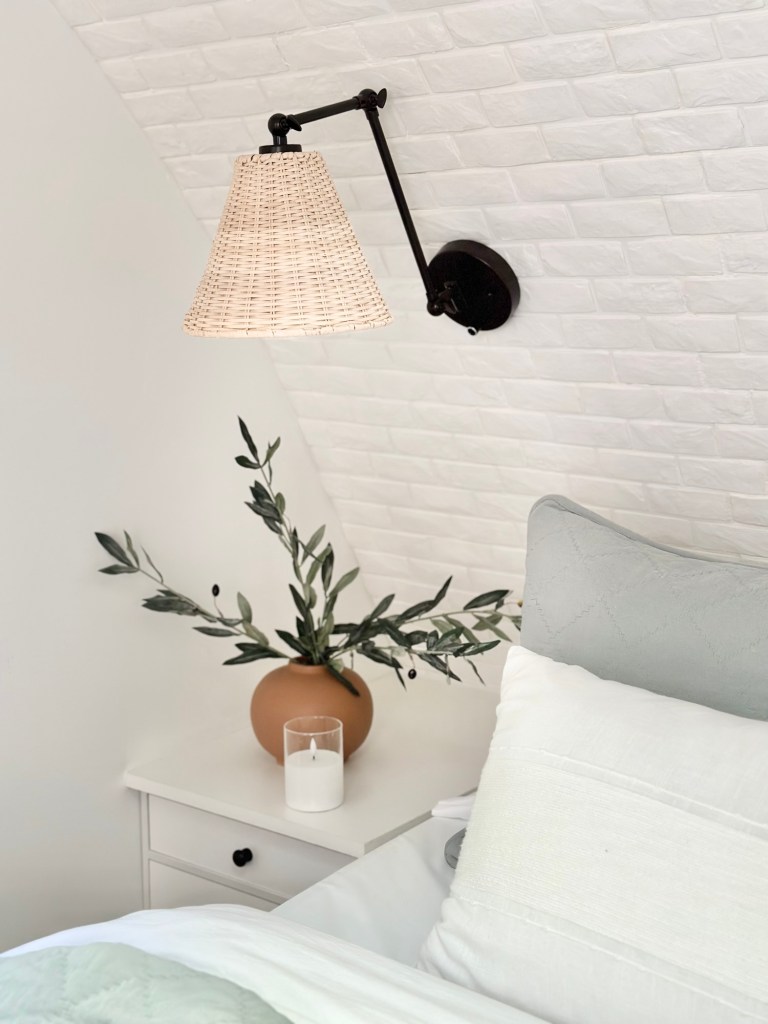
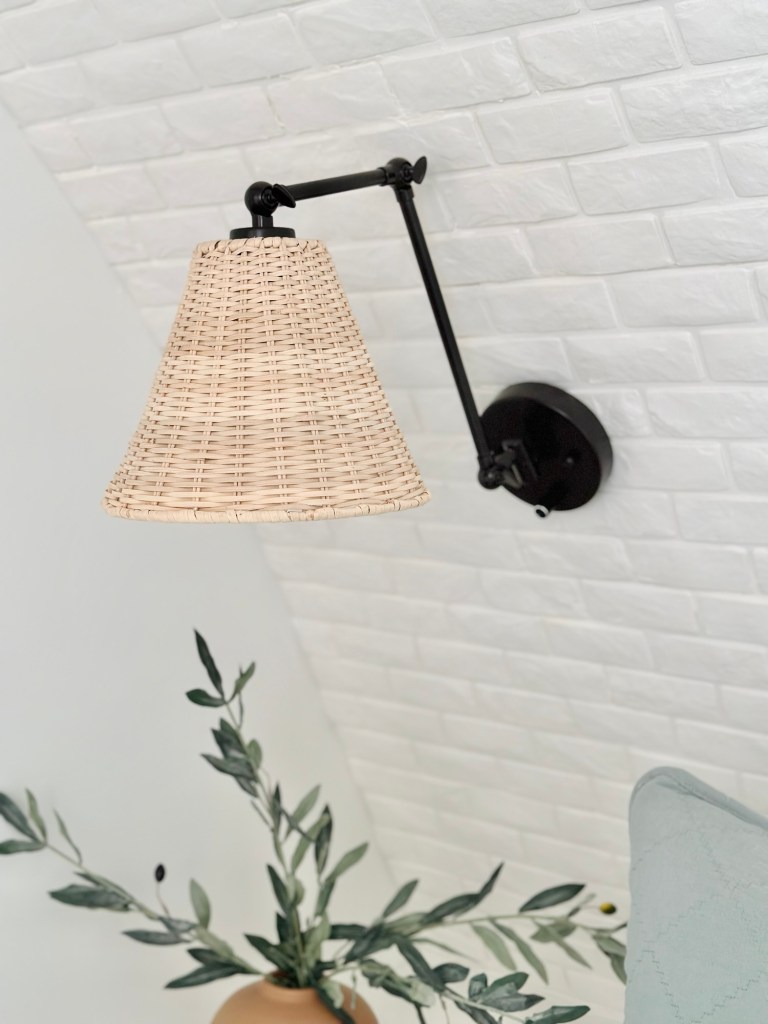
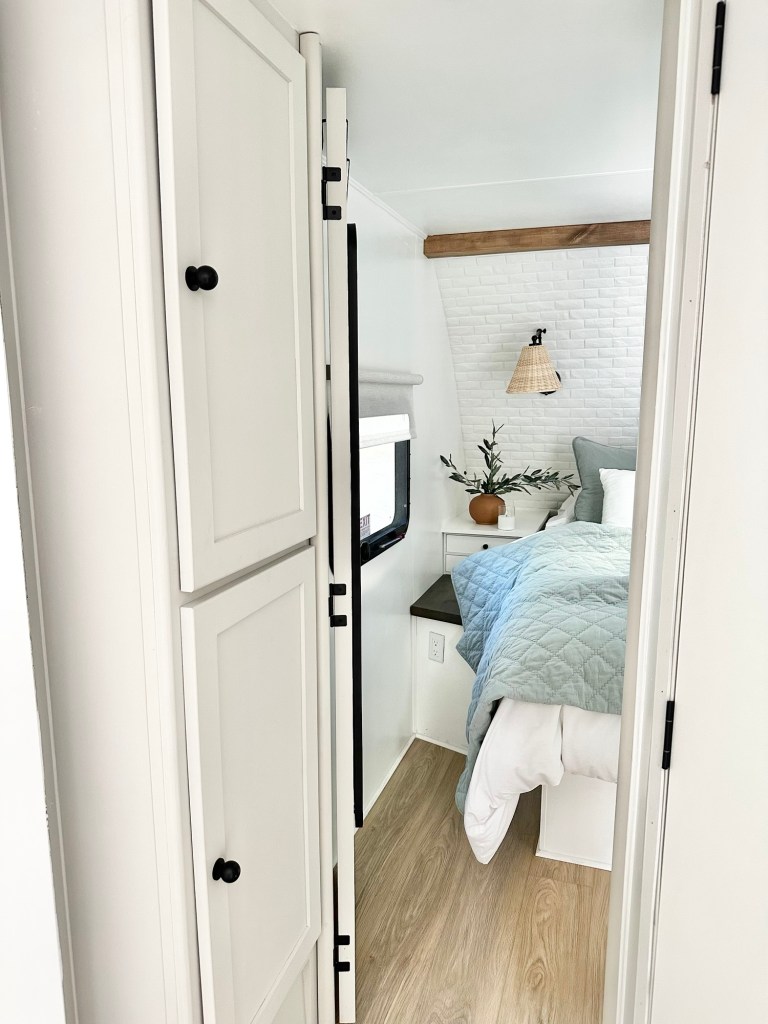
Sometimes you have to risk it to get the biscuit! I was slightly nervous about this design idea but in the end I’m so glad I went for it! We removed the dark cave around the bed and opened it all up. I did a peel and stick brick behind the bed, added two beautiful sconces using the old electrical from the previous lights, added a faux beam above to cover up the seem from the plywood wall we had to add. One of my favorite design ideas in this space was making use of the long empty space on each side of the bed. I used two nightstand boxes to create an extra long nightstand a drawer for storage. I get asked all the time “Where do you put your clothes?” and there is quite a bit of space under the bed and in the bunk room.The vibe and the openness is worth it in my opinion!


details
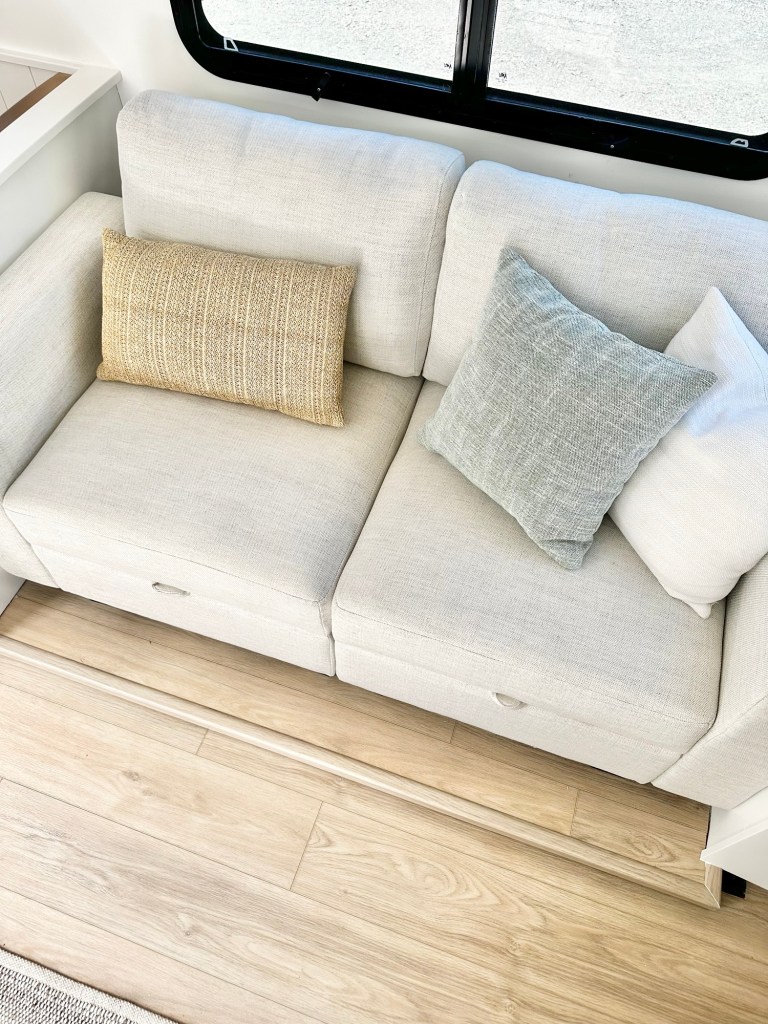
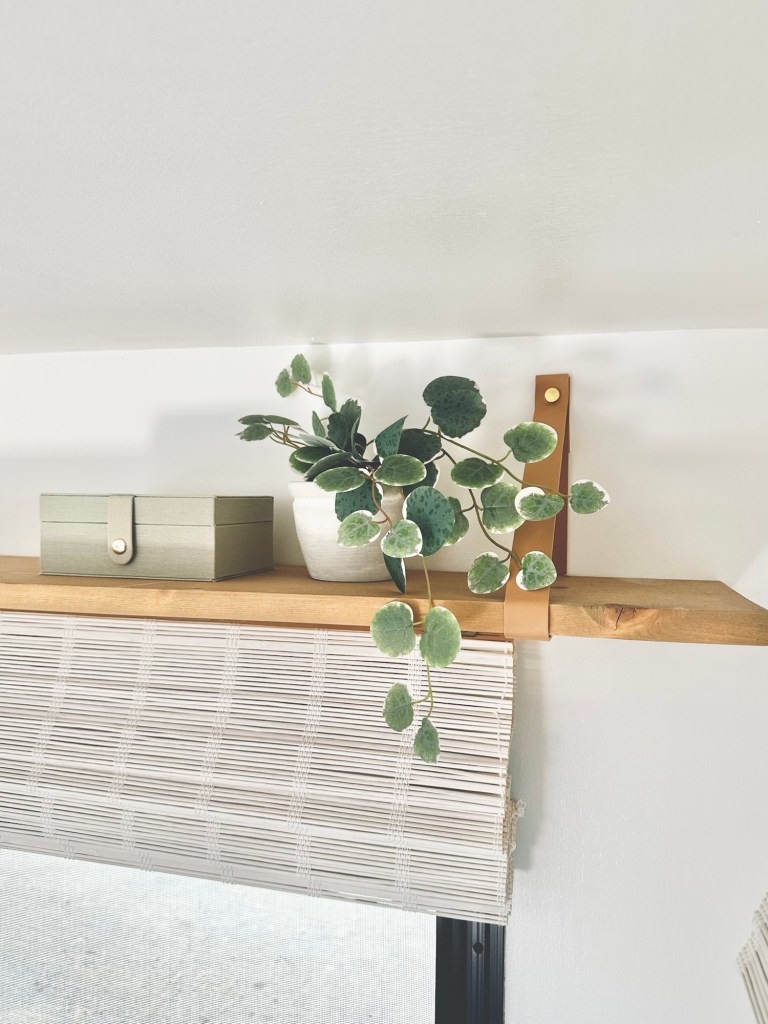
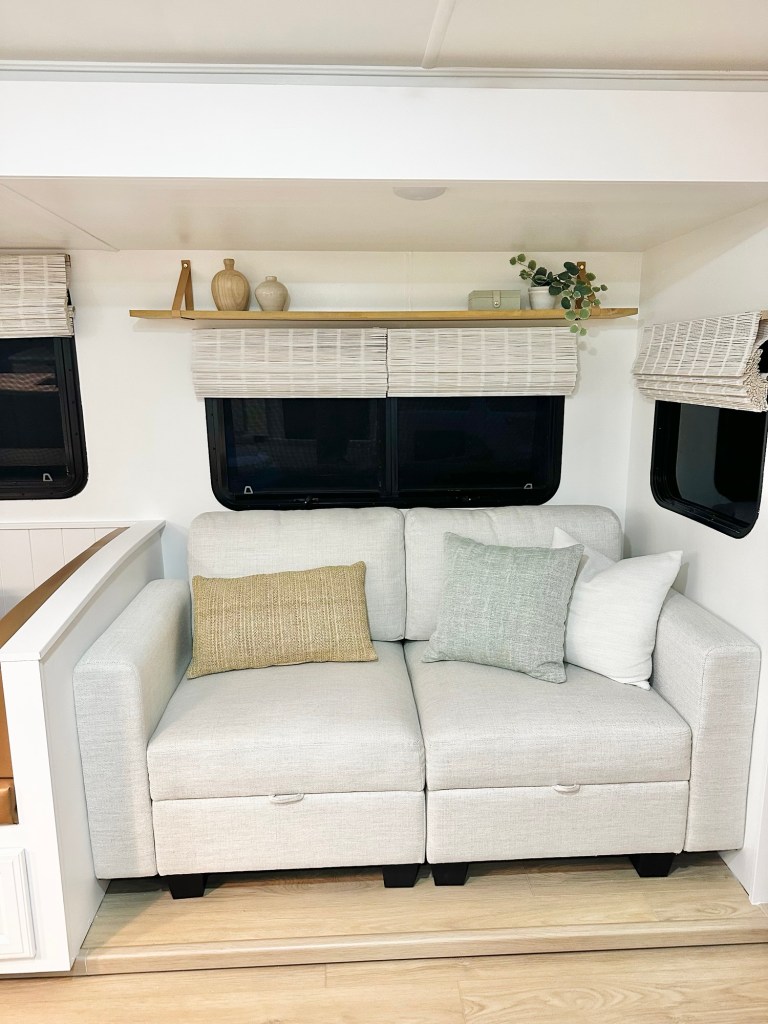
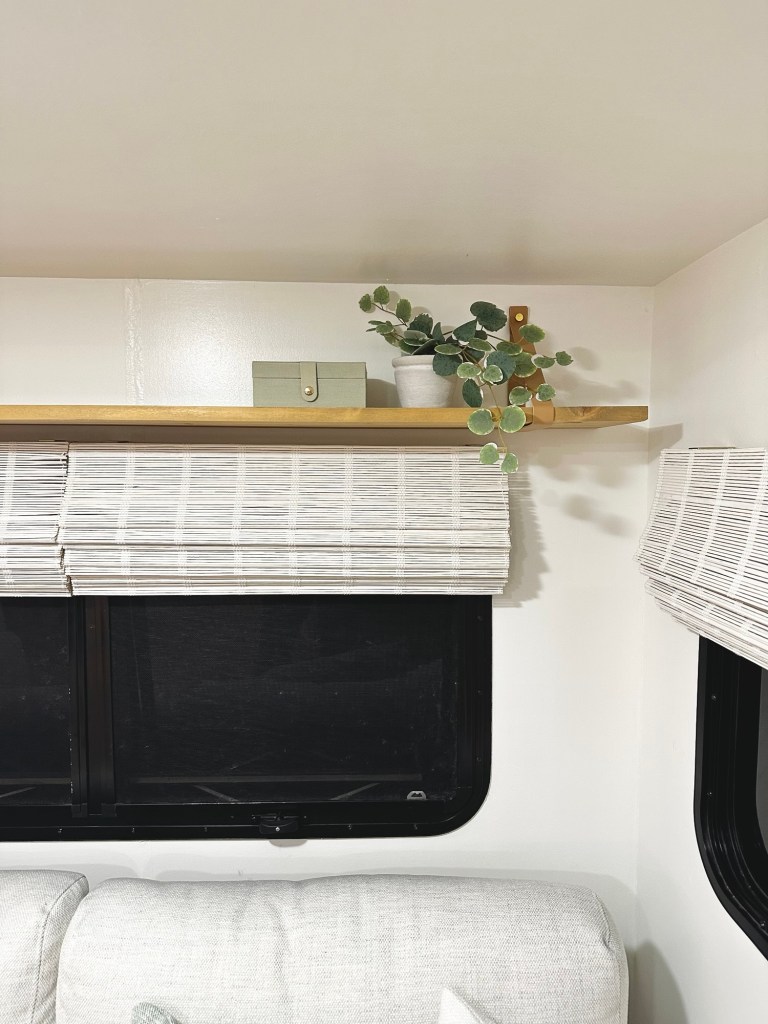
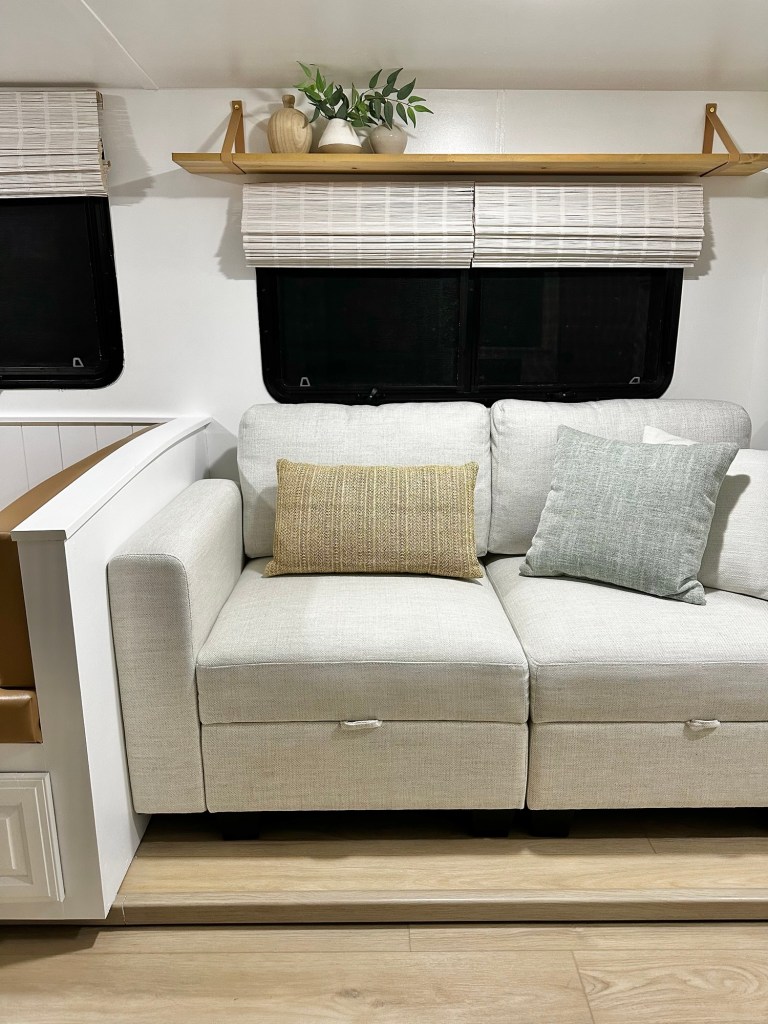
For the living space we wanted it open and airy again so I quickly removed the old cabinet above the sofa. I added a new wood shelf with some pretty leather brackets (I modified the size and cut them to fit the size of the shelf). I found this simple affordable sofa that has hidden storage from Amazon. You can see it fit perfectly in the space with no room to spare.


details
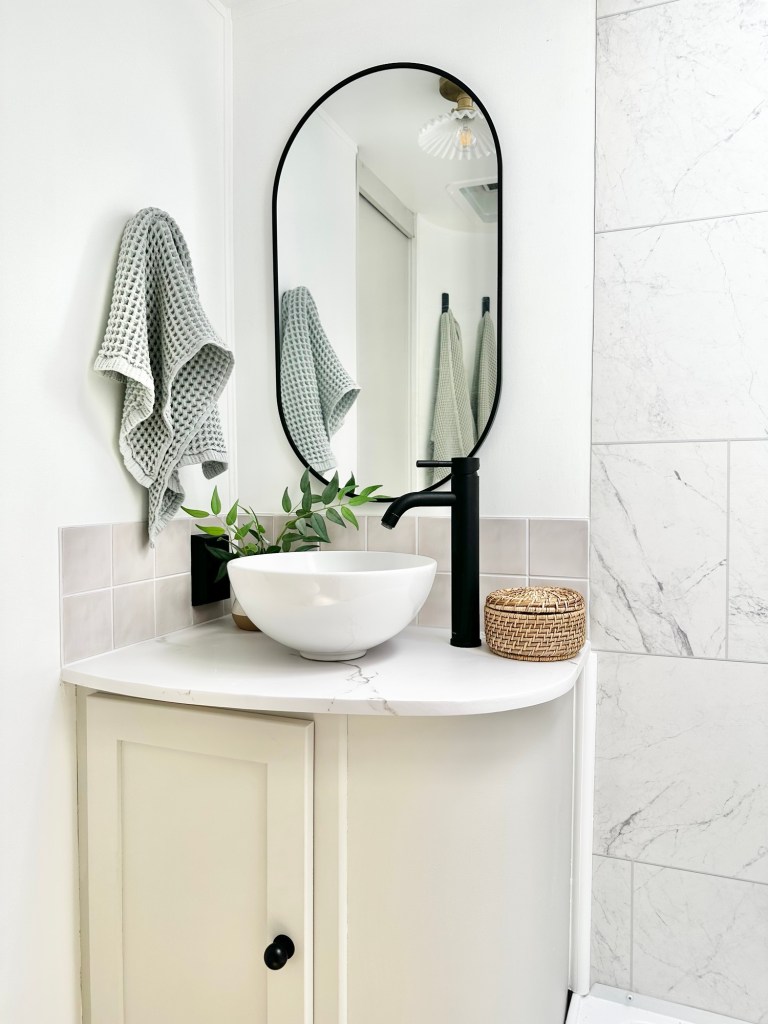
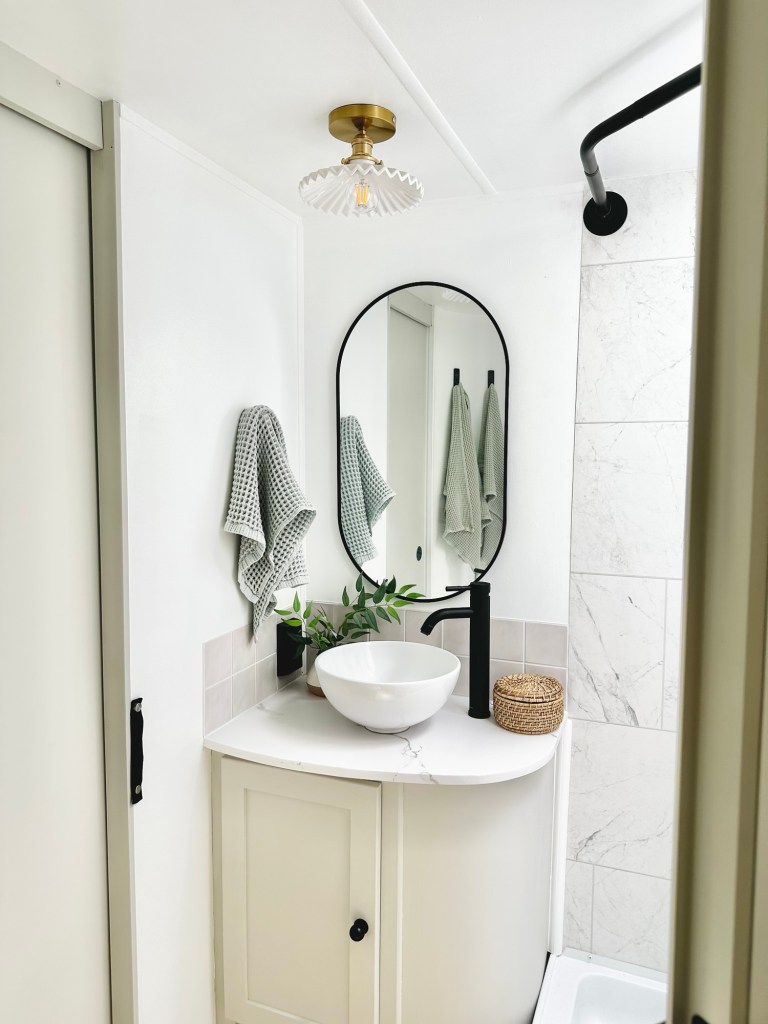
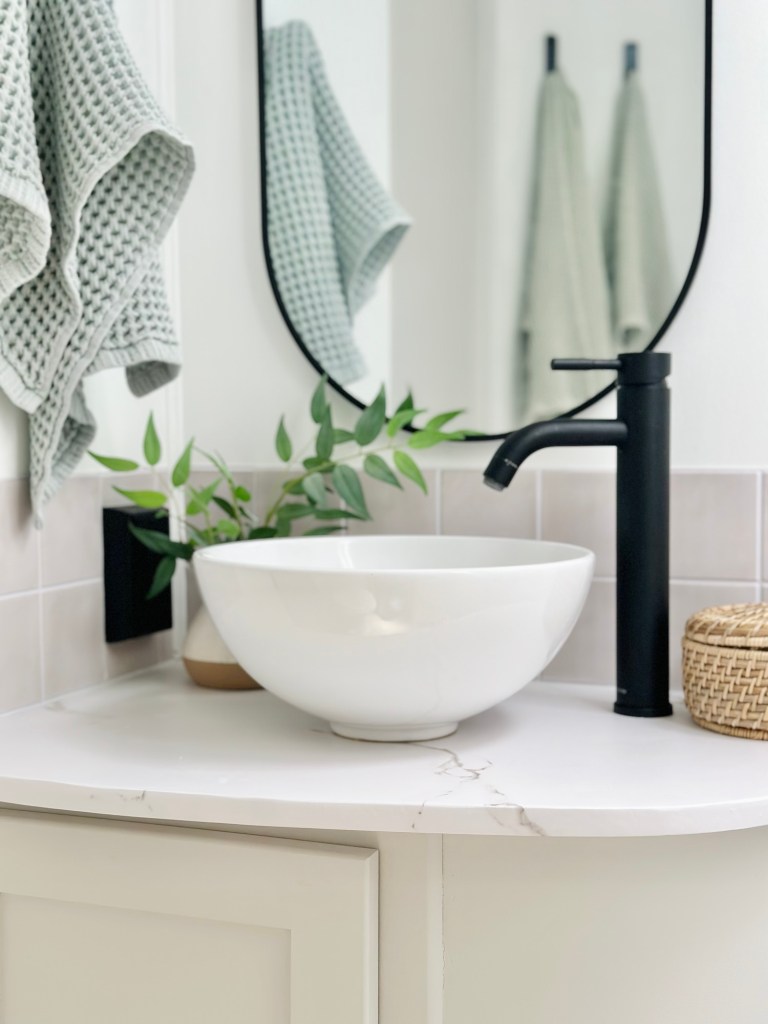
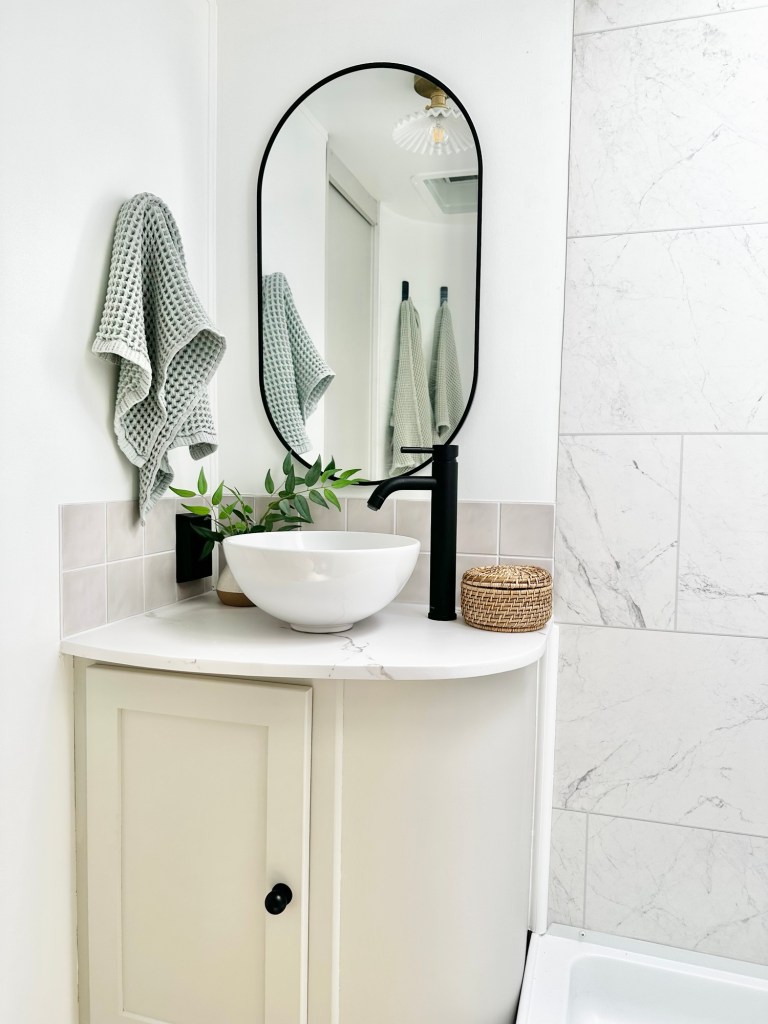
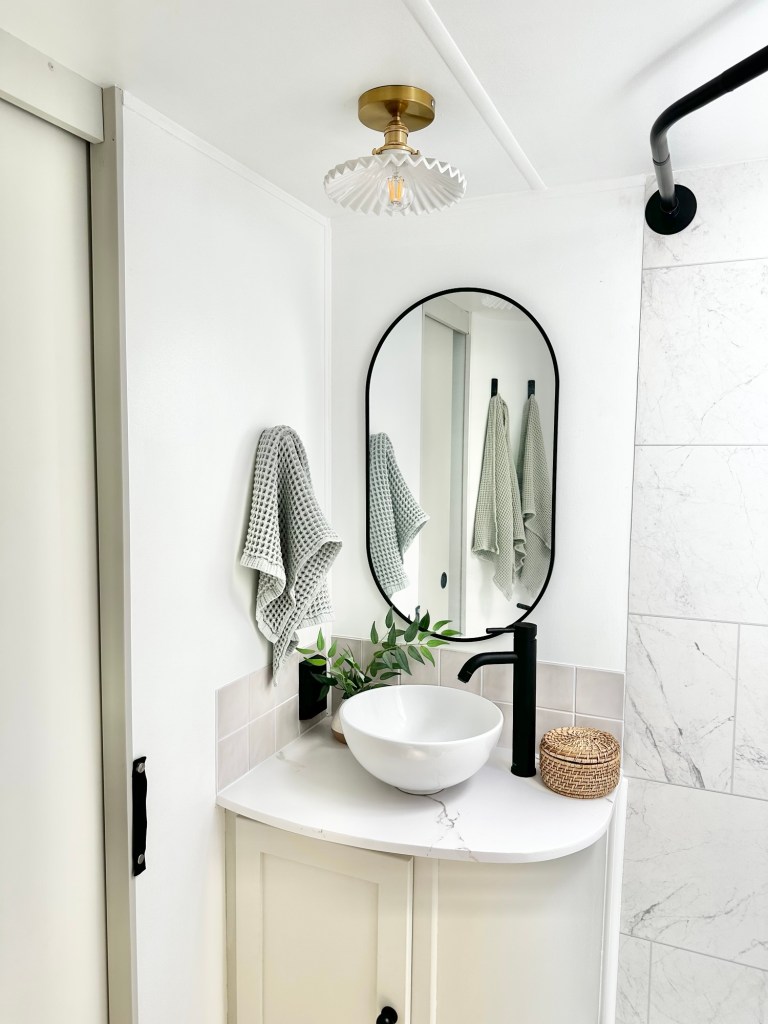
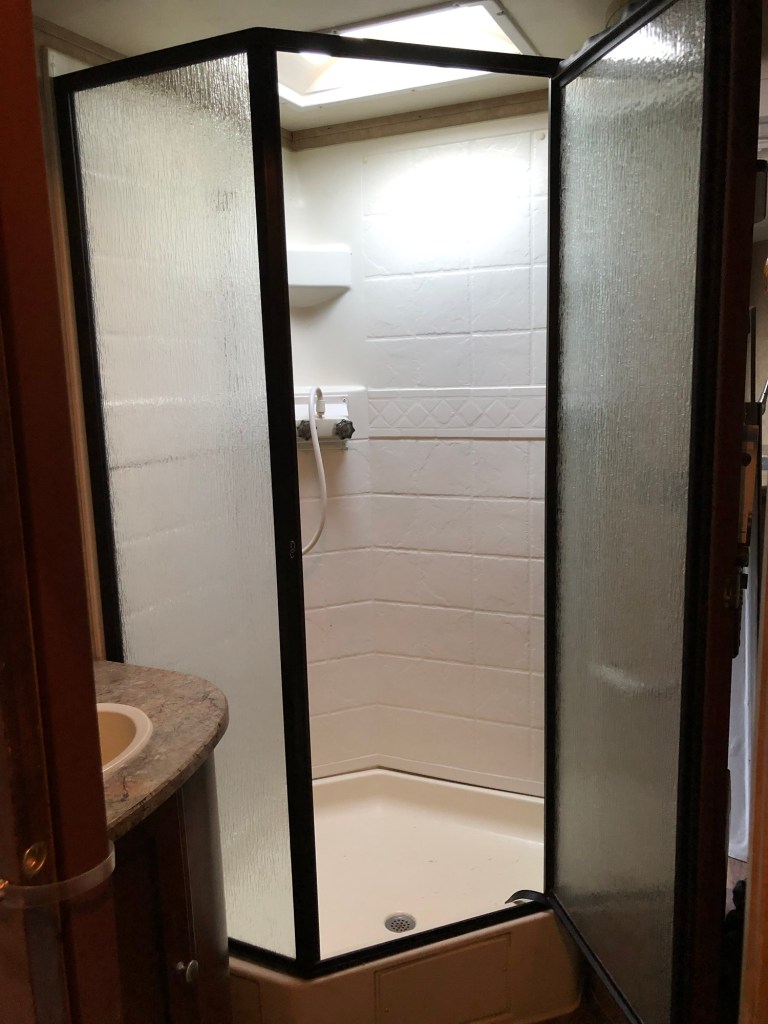
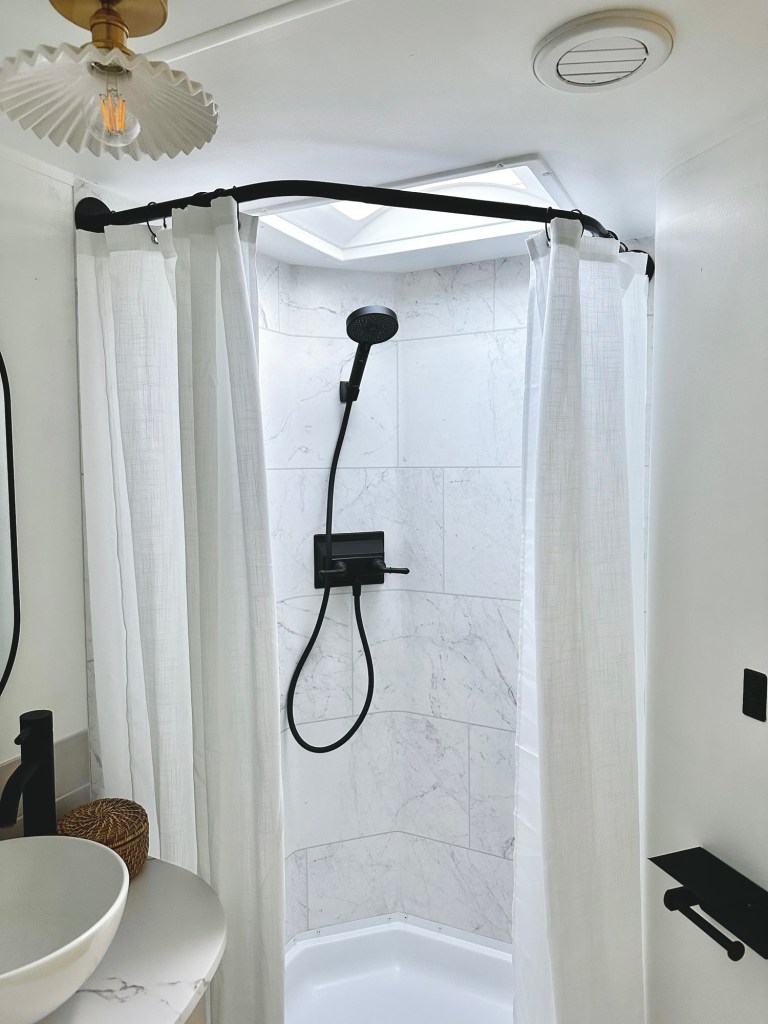
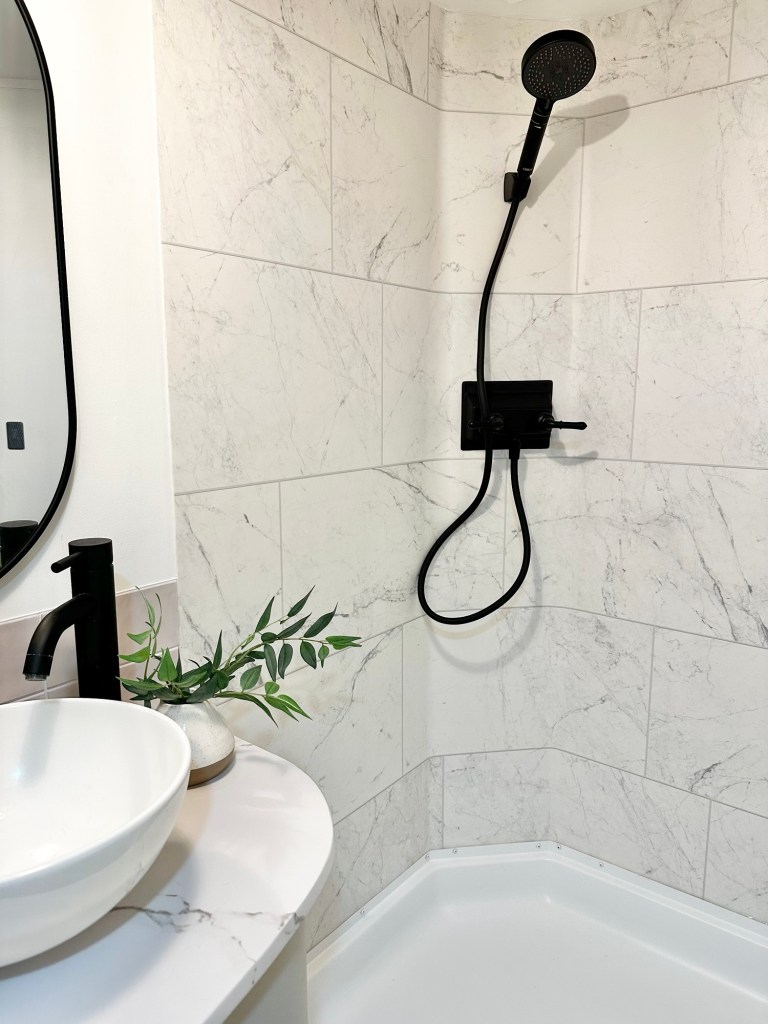
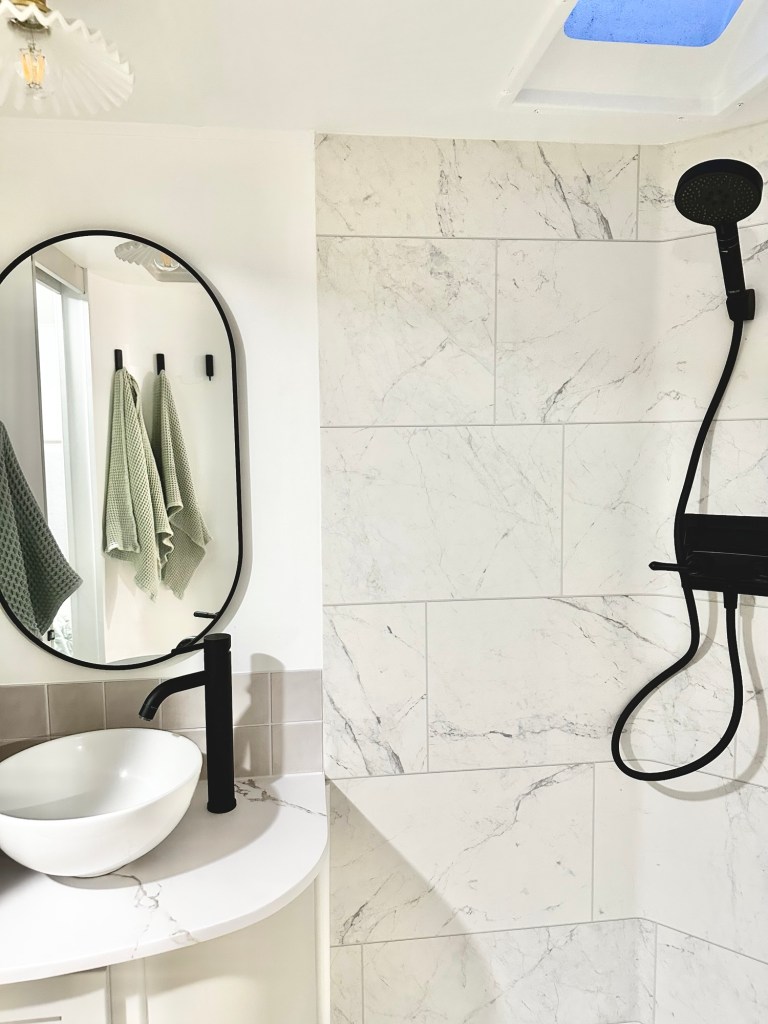
Welcome to the smallest bathroom ever. We made it work though and I did love how there was a door on each side. One for the main living space and one entering in from the bedroom. I had many plans for the shower but it was another “wait til the end” project we were dreading. I think if I could do it again I would have done something different but the shower plan was a last minute idea we found on Pinterest. We glued vinyl sheet flooring to the walls. Waterproof and looks like real tile. Added a new toilet, countertop with this beautiful affordable sink bowl. I sure love how this turned out!


details
I really just wanted to share the cabinet paint details here. I have used this chalk paint and sealing wax many times and absolutely love it! No prep just start painting. I like to use a small foam roller and then after all the coats of paint I do a sealing wax with a soft rag. I love the matte look and there are so many great color options.
Bunk room cabinet color is: Solid Wood, door color: Yarn, bathroom vanity color: Yarn, kitchen cabinet color: Blanched, island color is: Seasonal. I also want to mention you can find some of these in a spray paint. I chose the same Yarn color in a spray paint to spray the plastic door trim pieces. This made the colors match and gave a more durable perfect finish on the plastic parts.


Looking for sources?
Feel free to save these photos on your Pinterest! I truly appreciate it. Leave a comment if you have any questions! You can also see more details and the entire travel trailer remodel saved in my Instagram story highlights!


Leave a comment